

Welcome back to this week’s Feature Friday! Today we want to talk about a topic we are very passionate about and that is 3D printed fashion. With the success of our first endeavours into the world or Fashion back in January (more about that here) and after gaining some initial hands-on experience in the field, we hoped that this was just the beginning. And yes indeed, it was. This time the challenge was to create a fully 3D printed T-Shirt as a concept piece. 3D printing in the clothing world is not new, but the idea of using desktop, FDM/FFF machines instead of laser sintering adds to the challenge. Also, we were keen to experiment with different materials and see how we could bring them together into 1 fully printed piece.
The Briefing
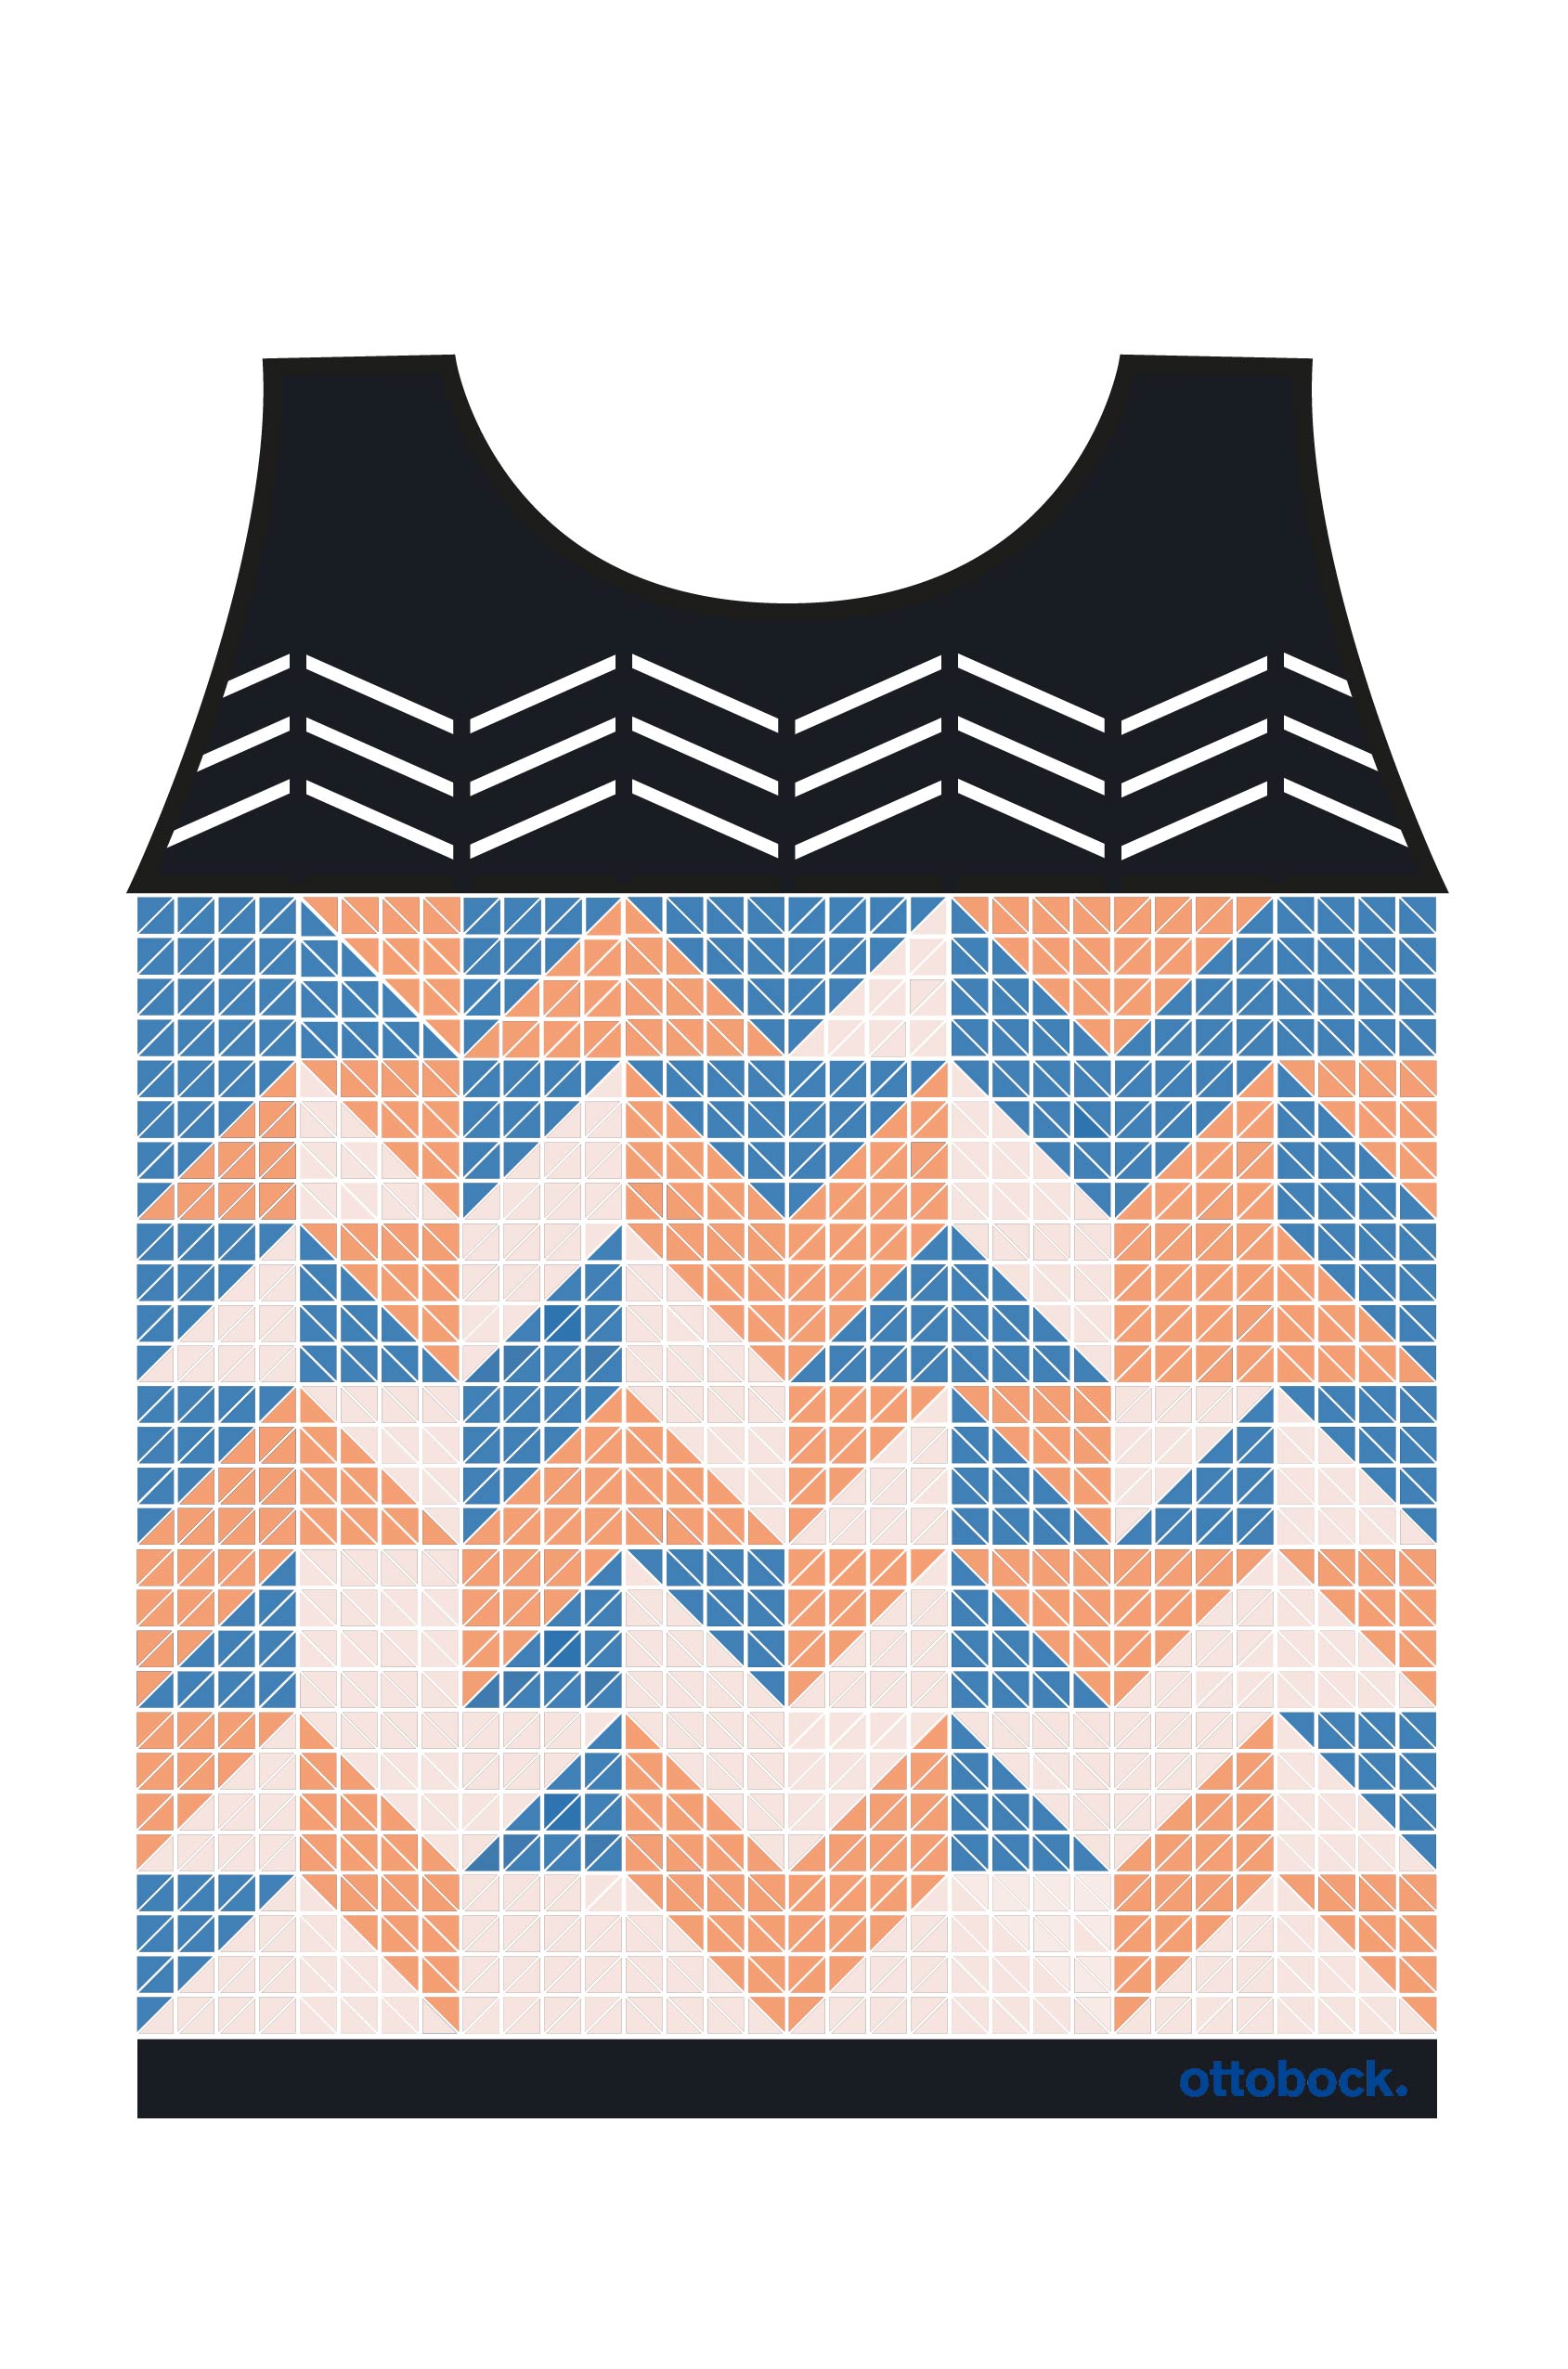
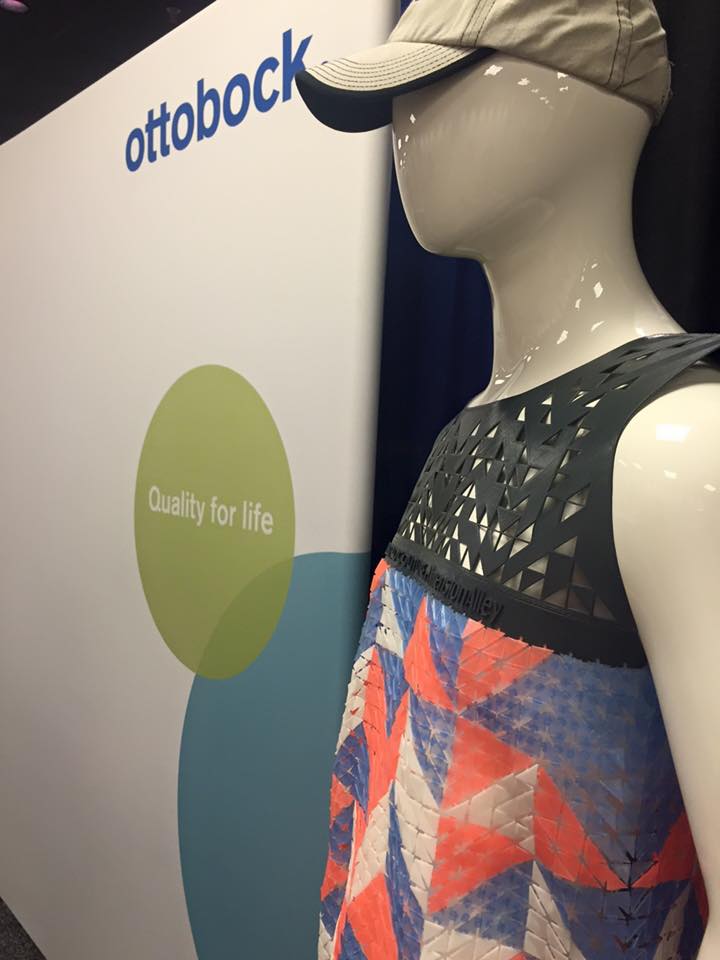
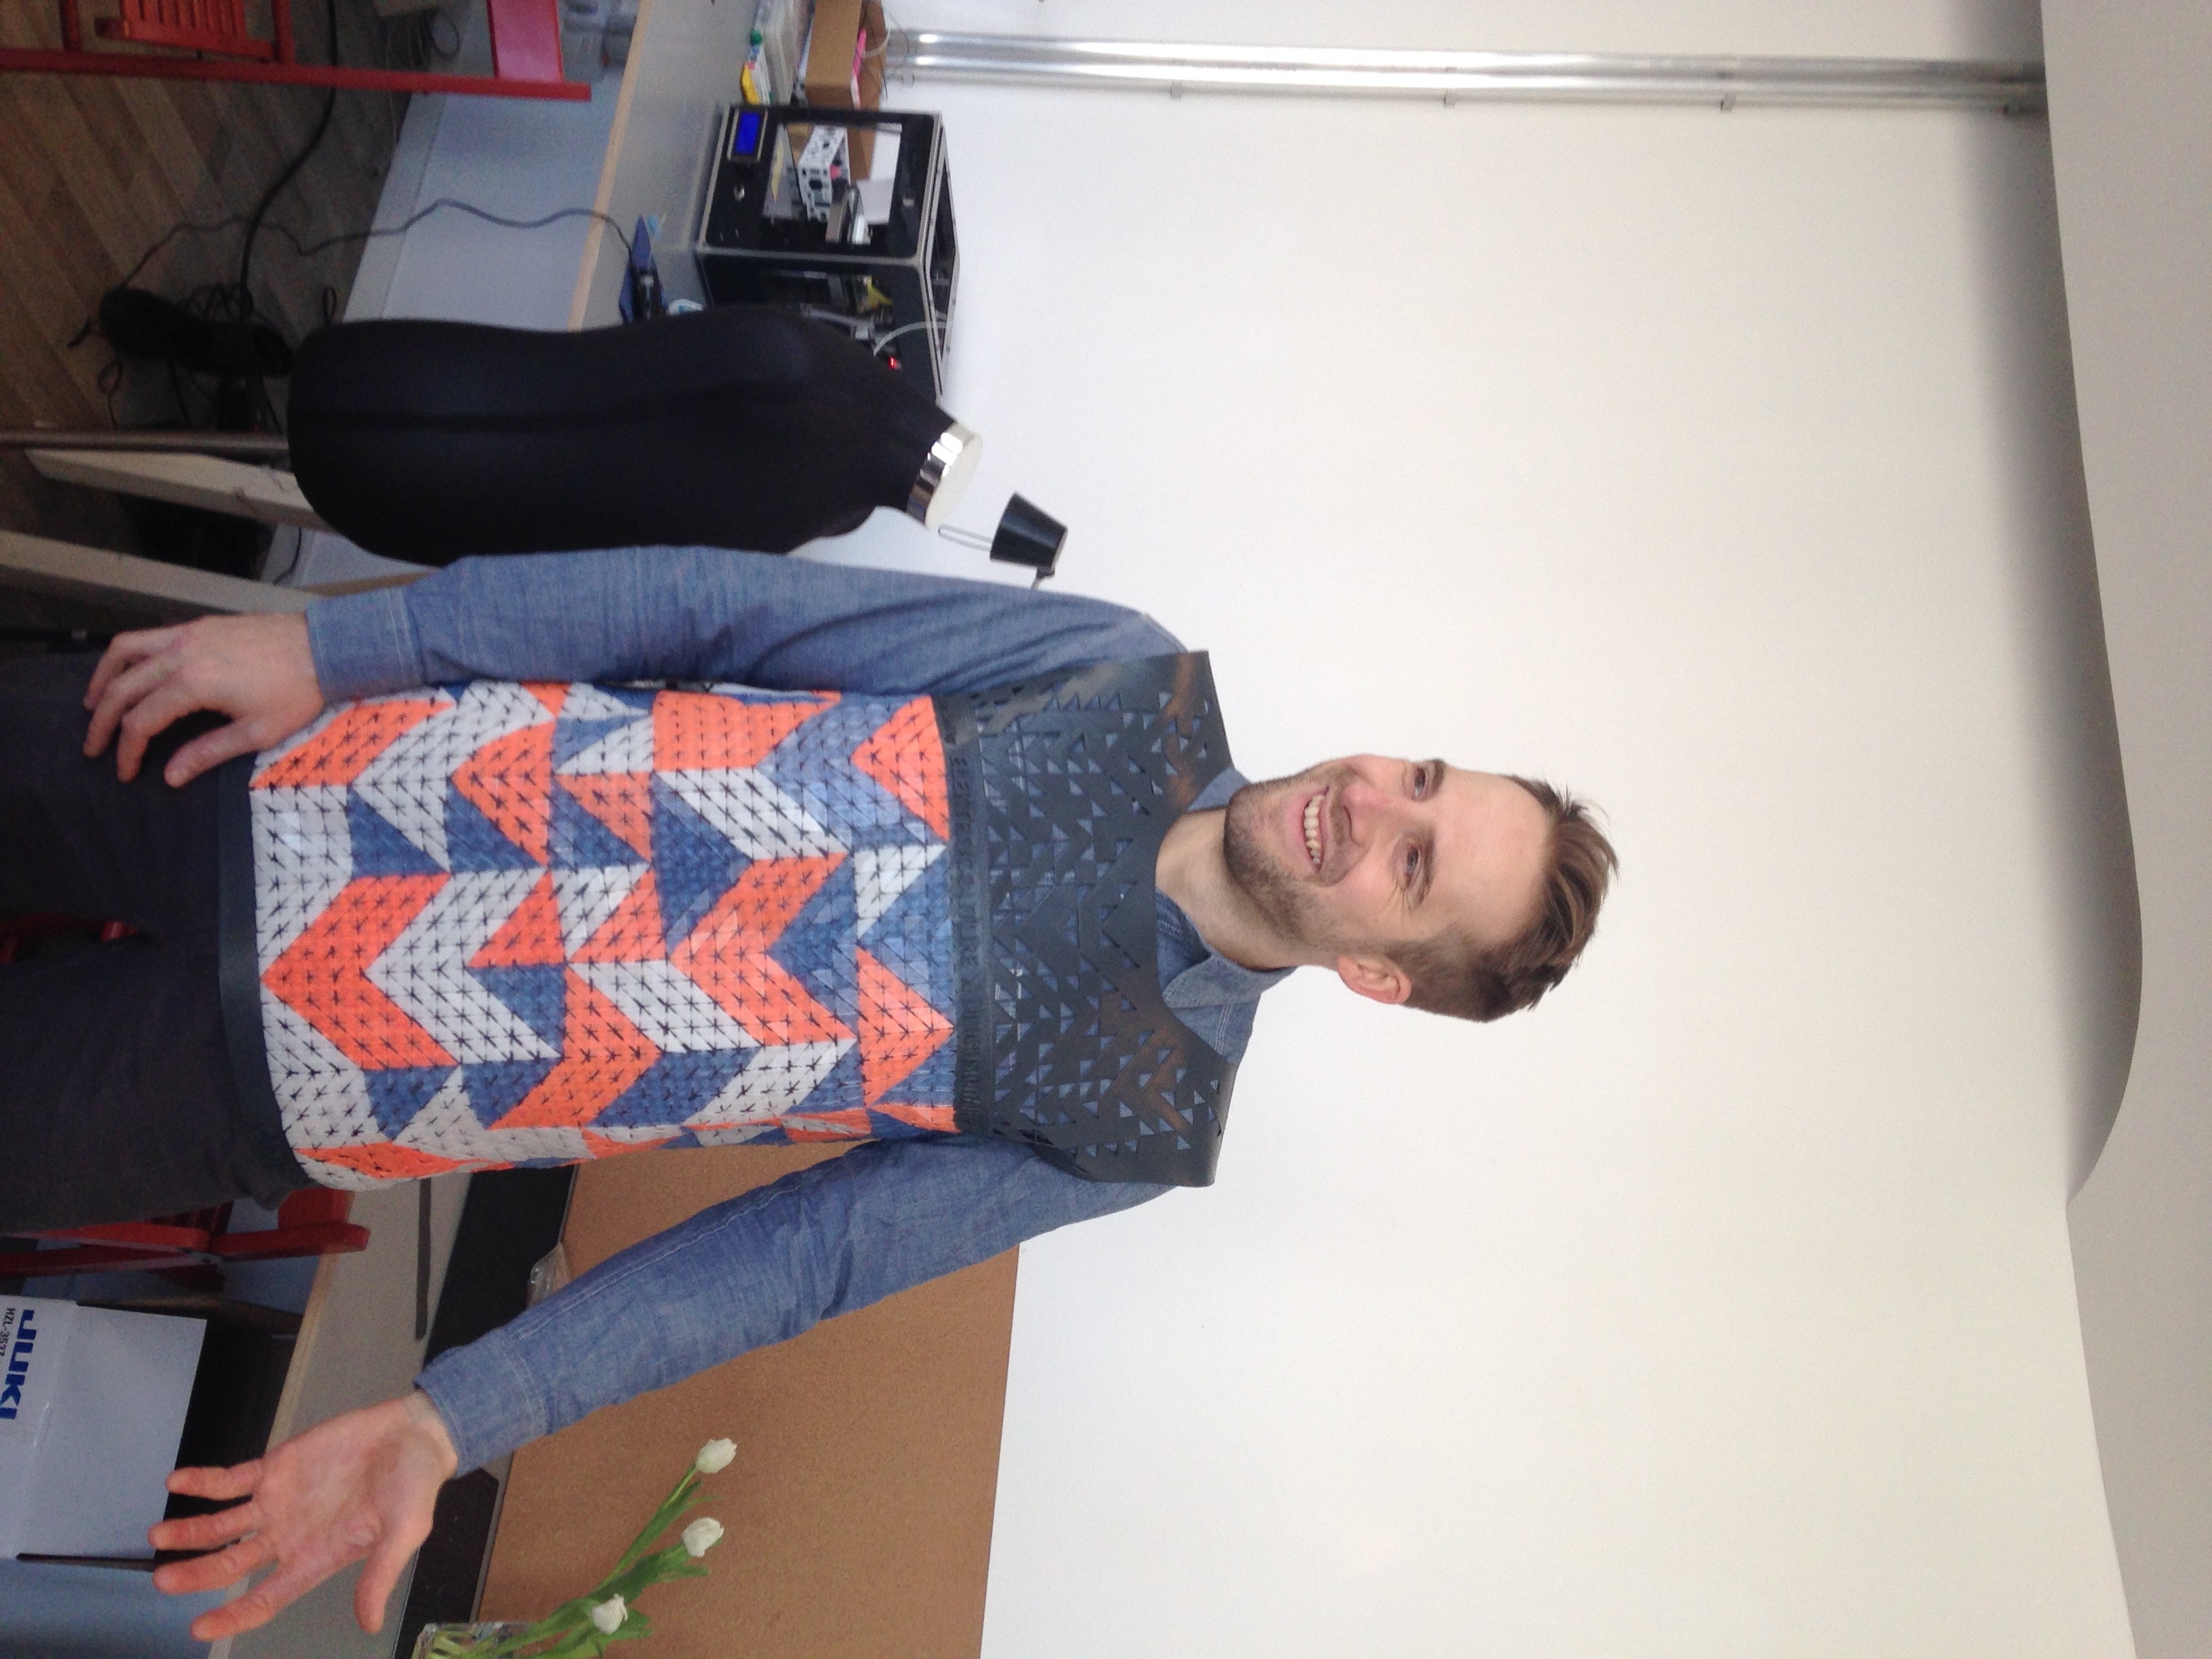
In the middle of February we received a phone call from Lisa Lang, the CEO and founder of ElektroCouture, and she had great news. Ottobock awarded her the project contract for creating a men’s shirt for the South by South West Festival in Austin, Texas. But instead of making an ordinary t-shirt Lisa wanted to 3D print the fashion piece with our help.
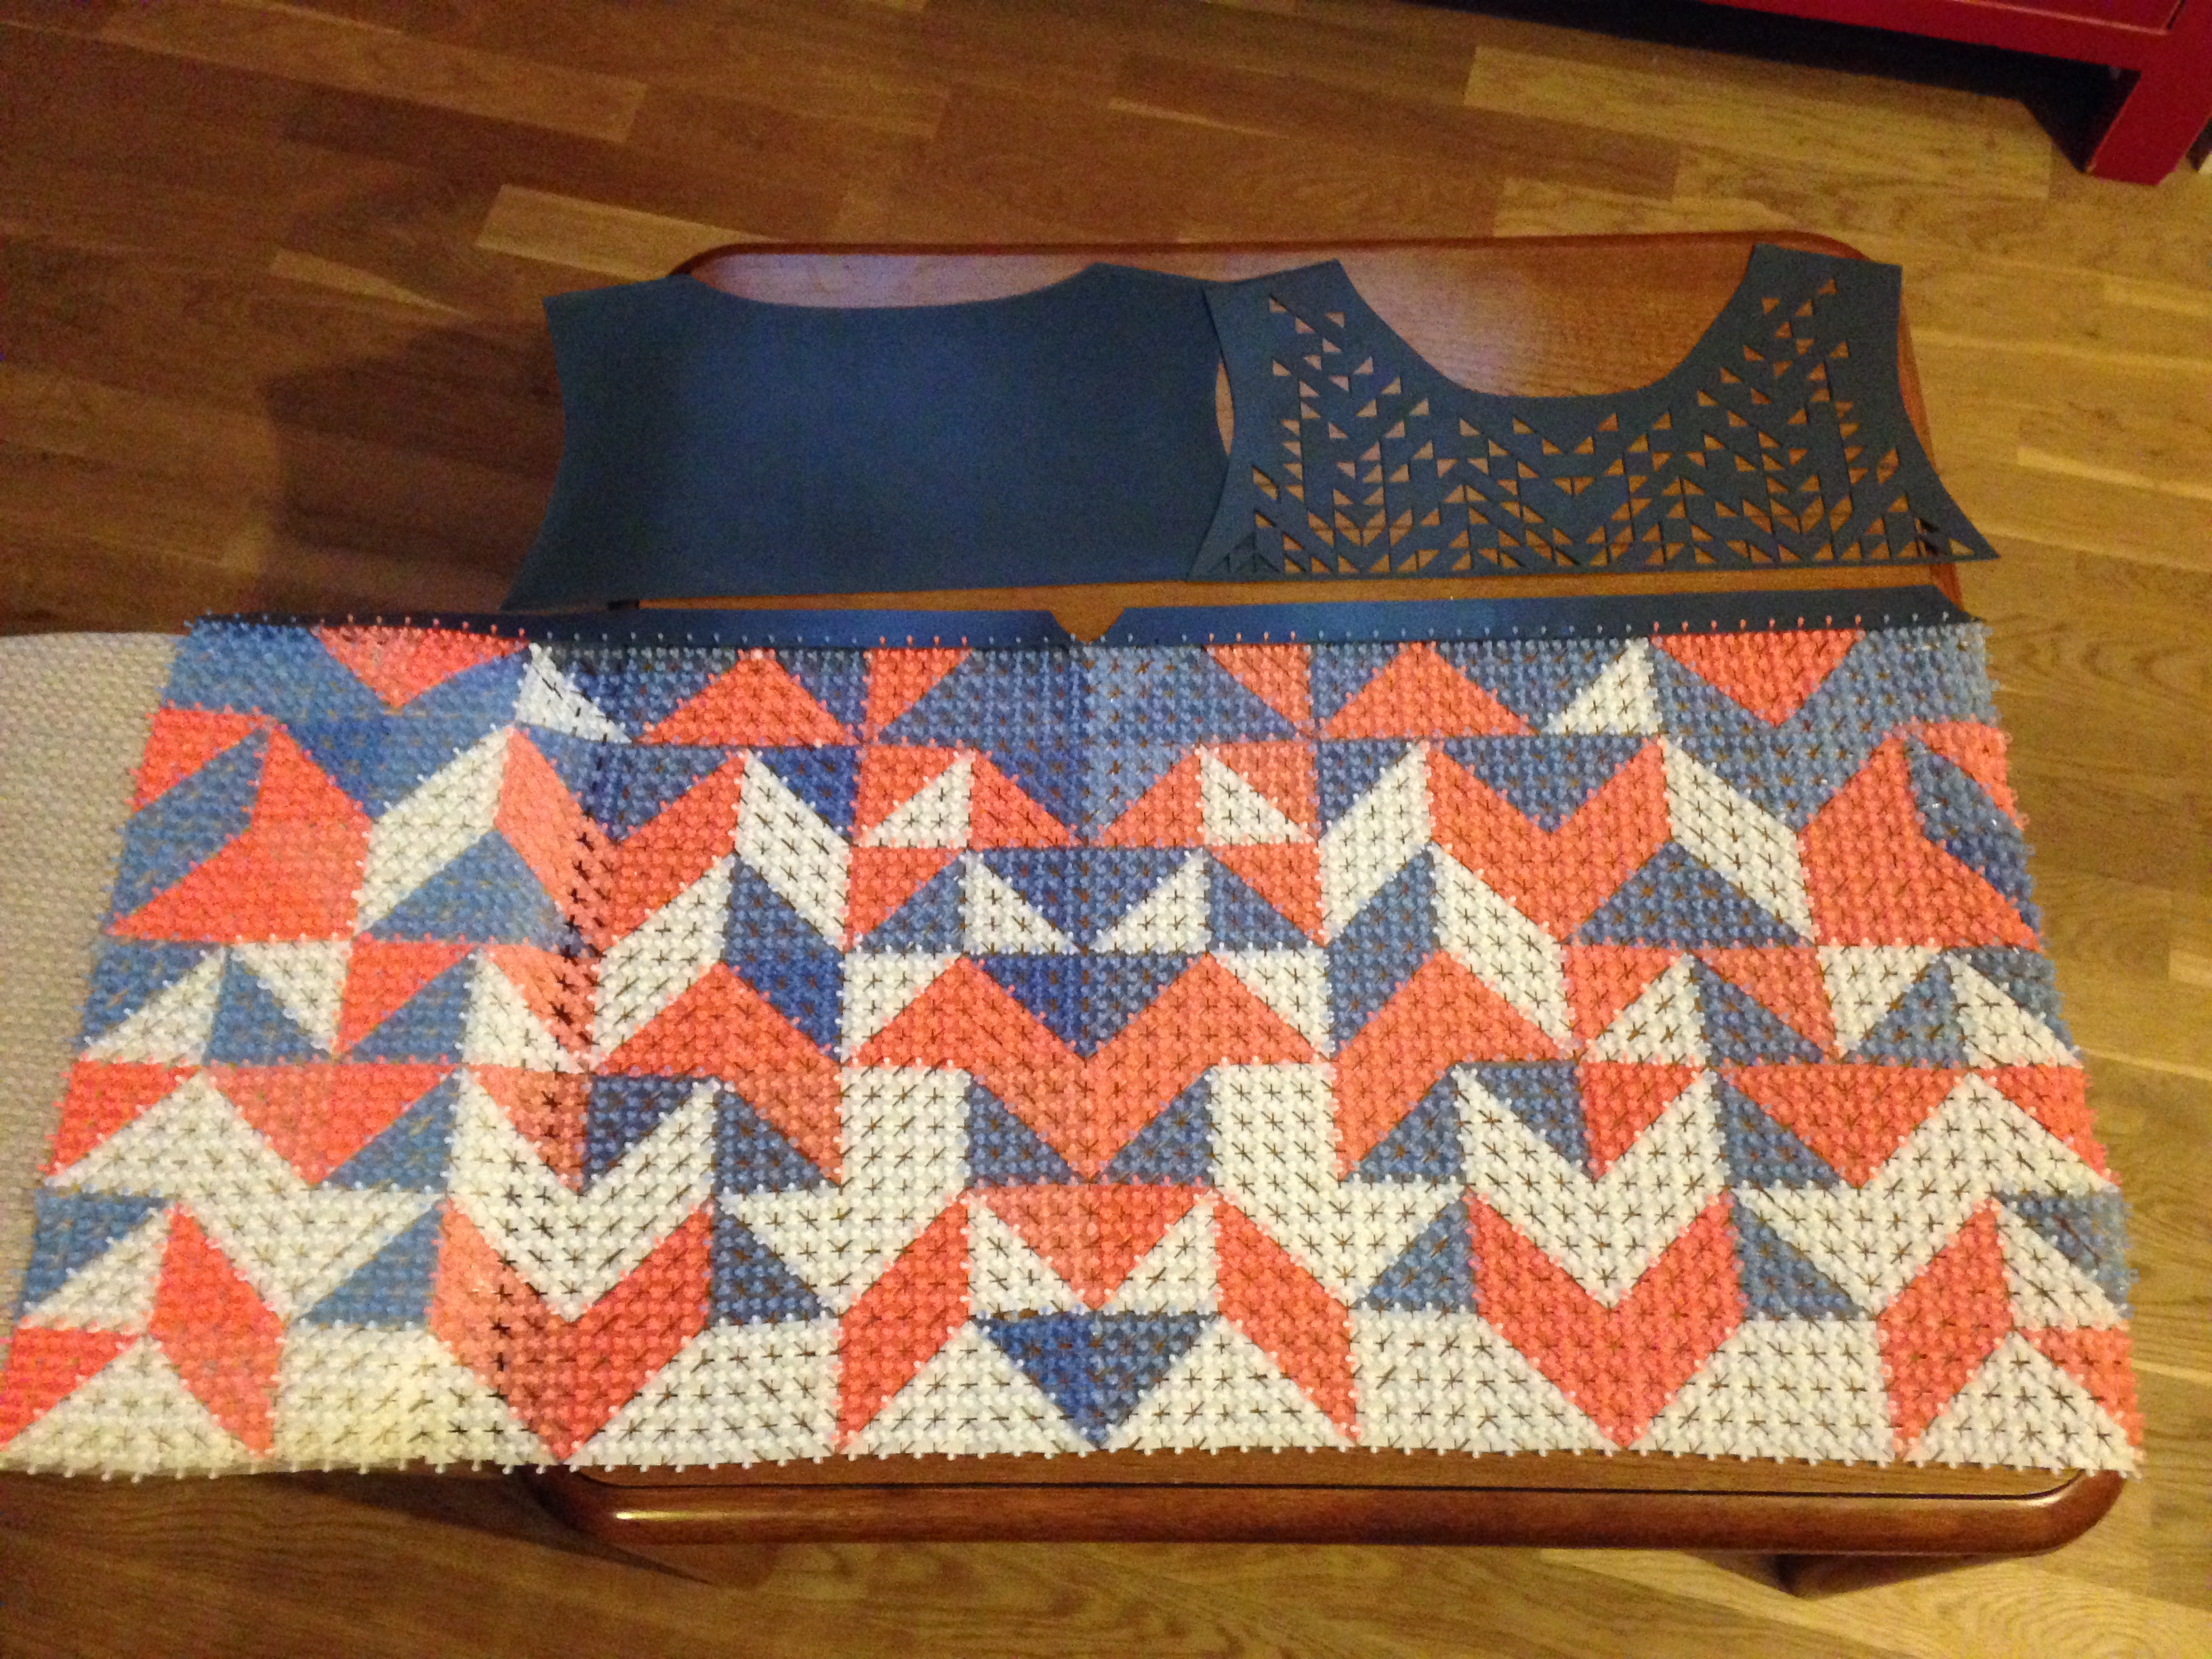
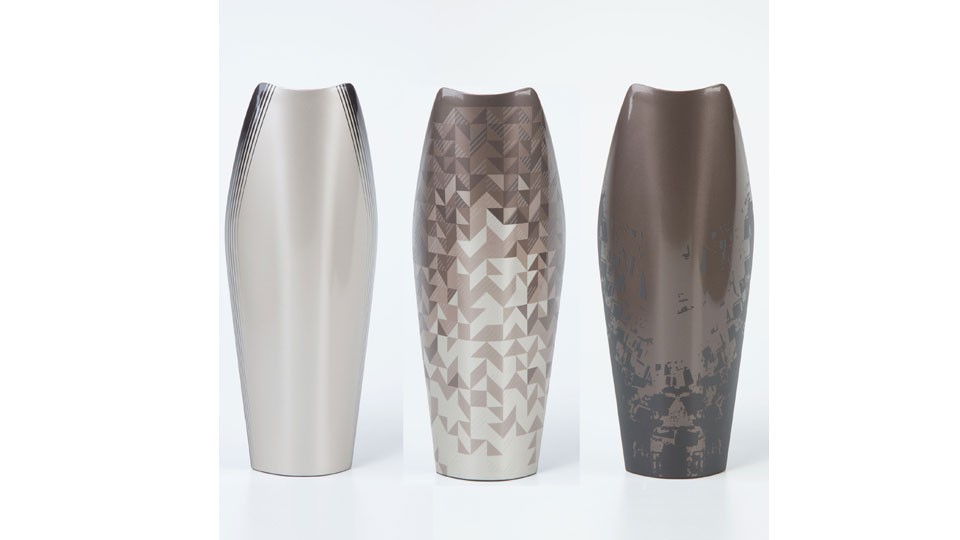
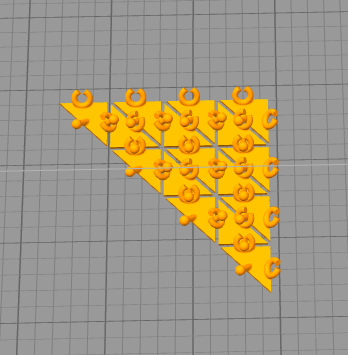
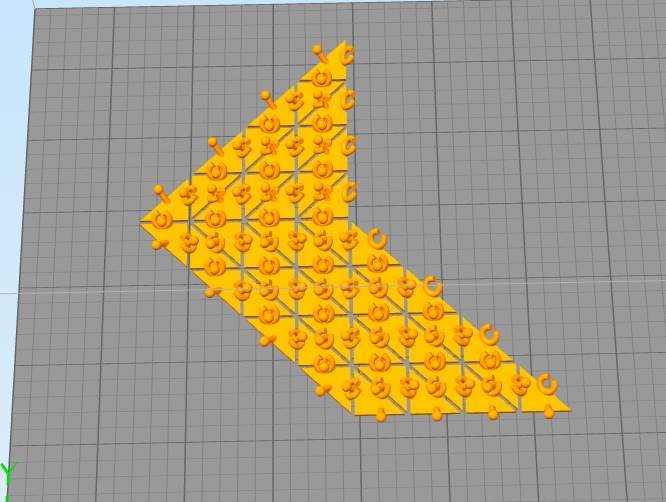
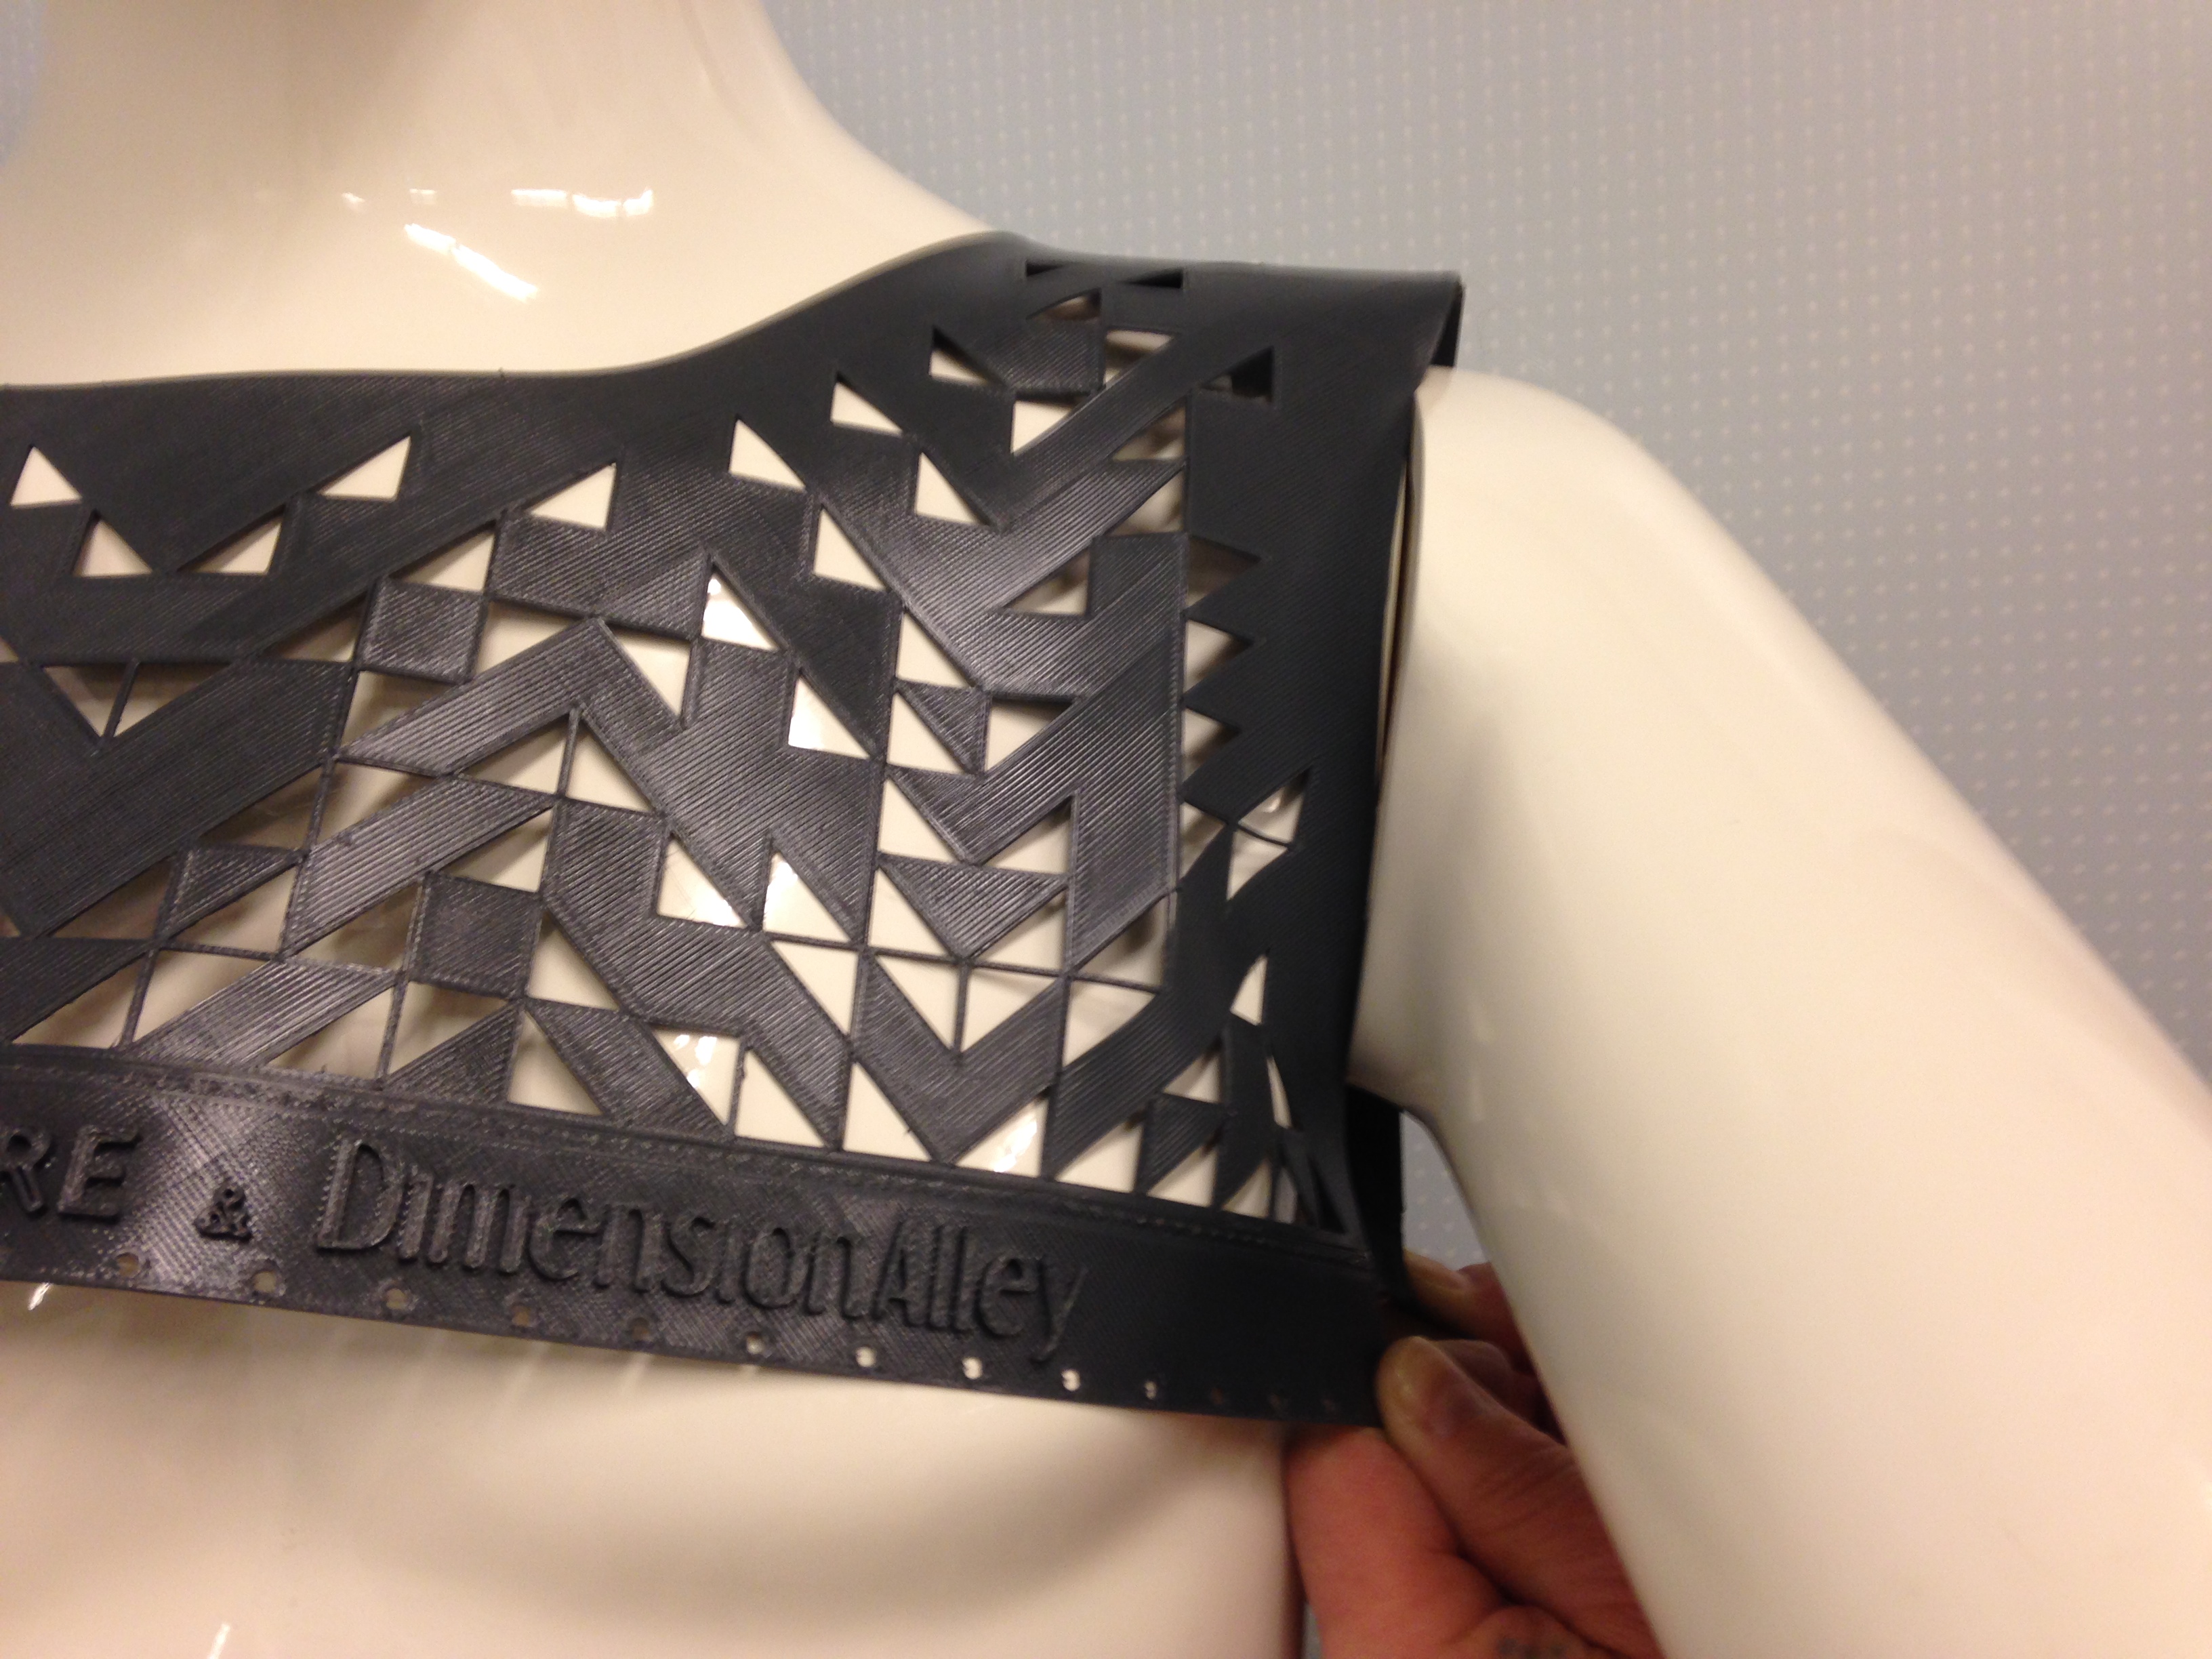
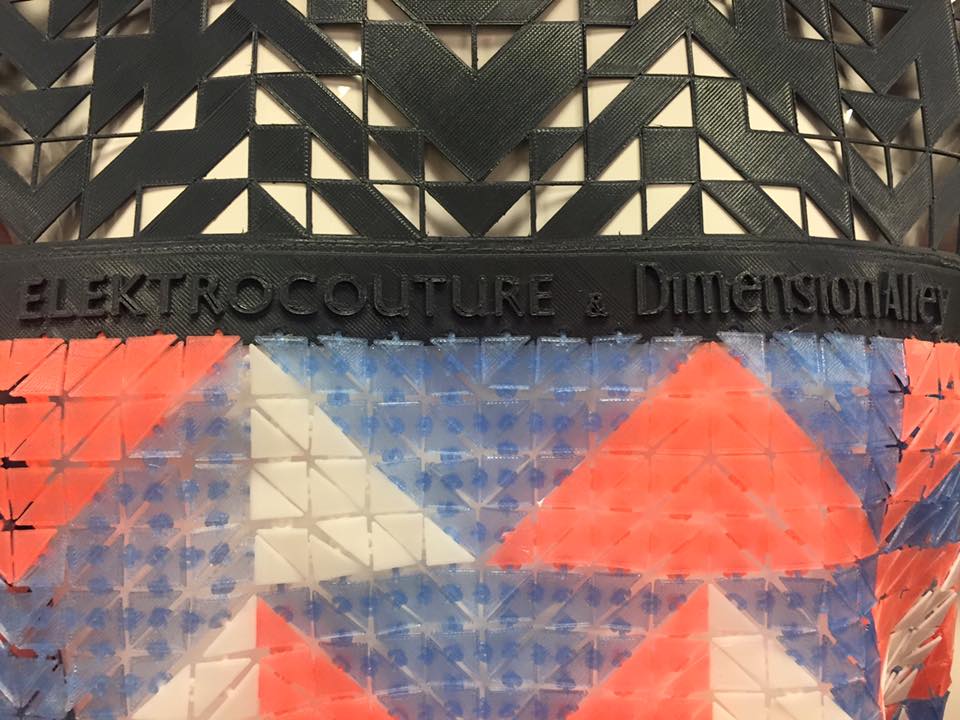
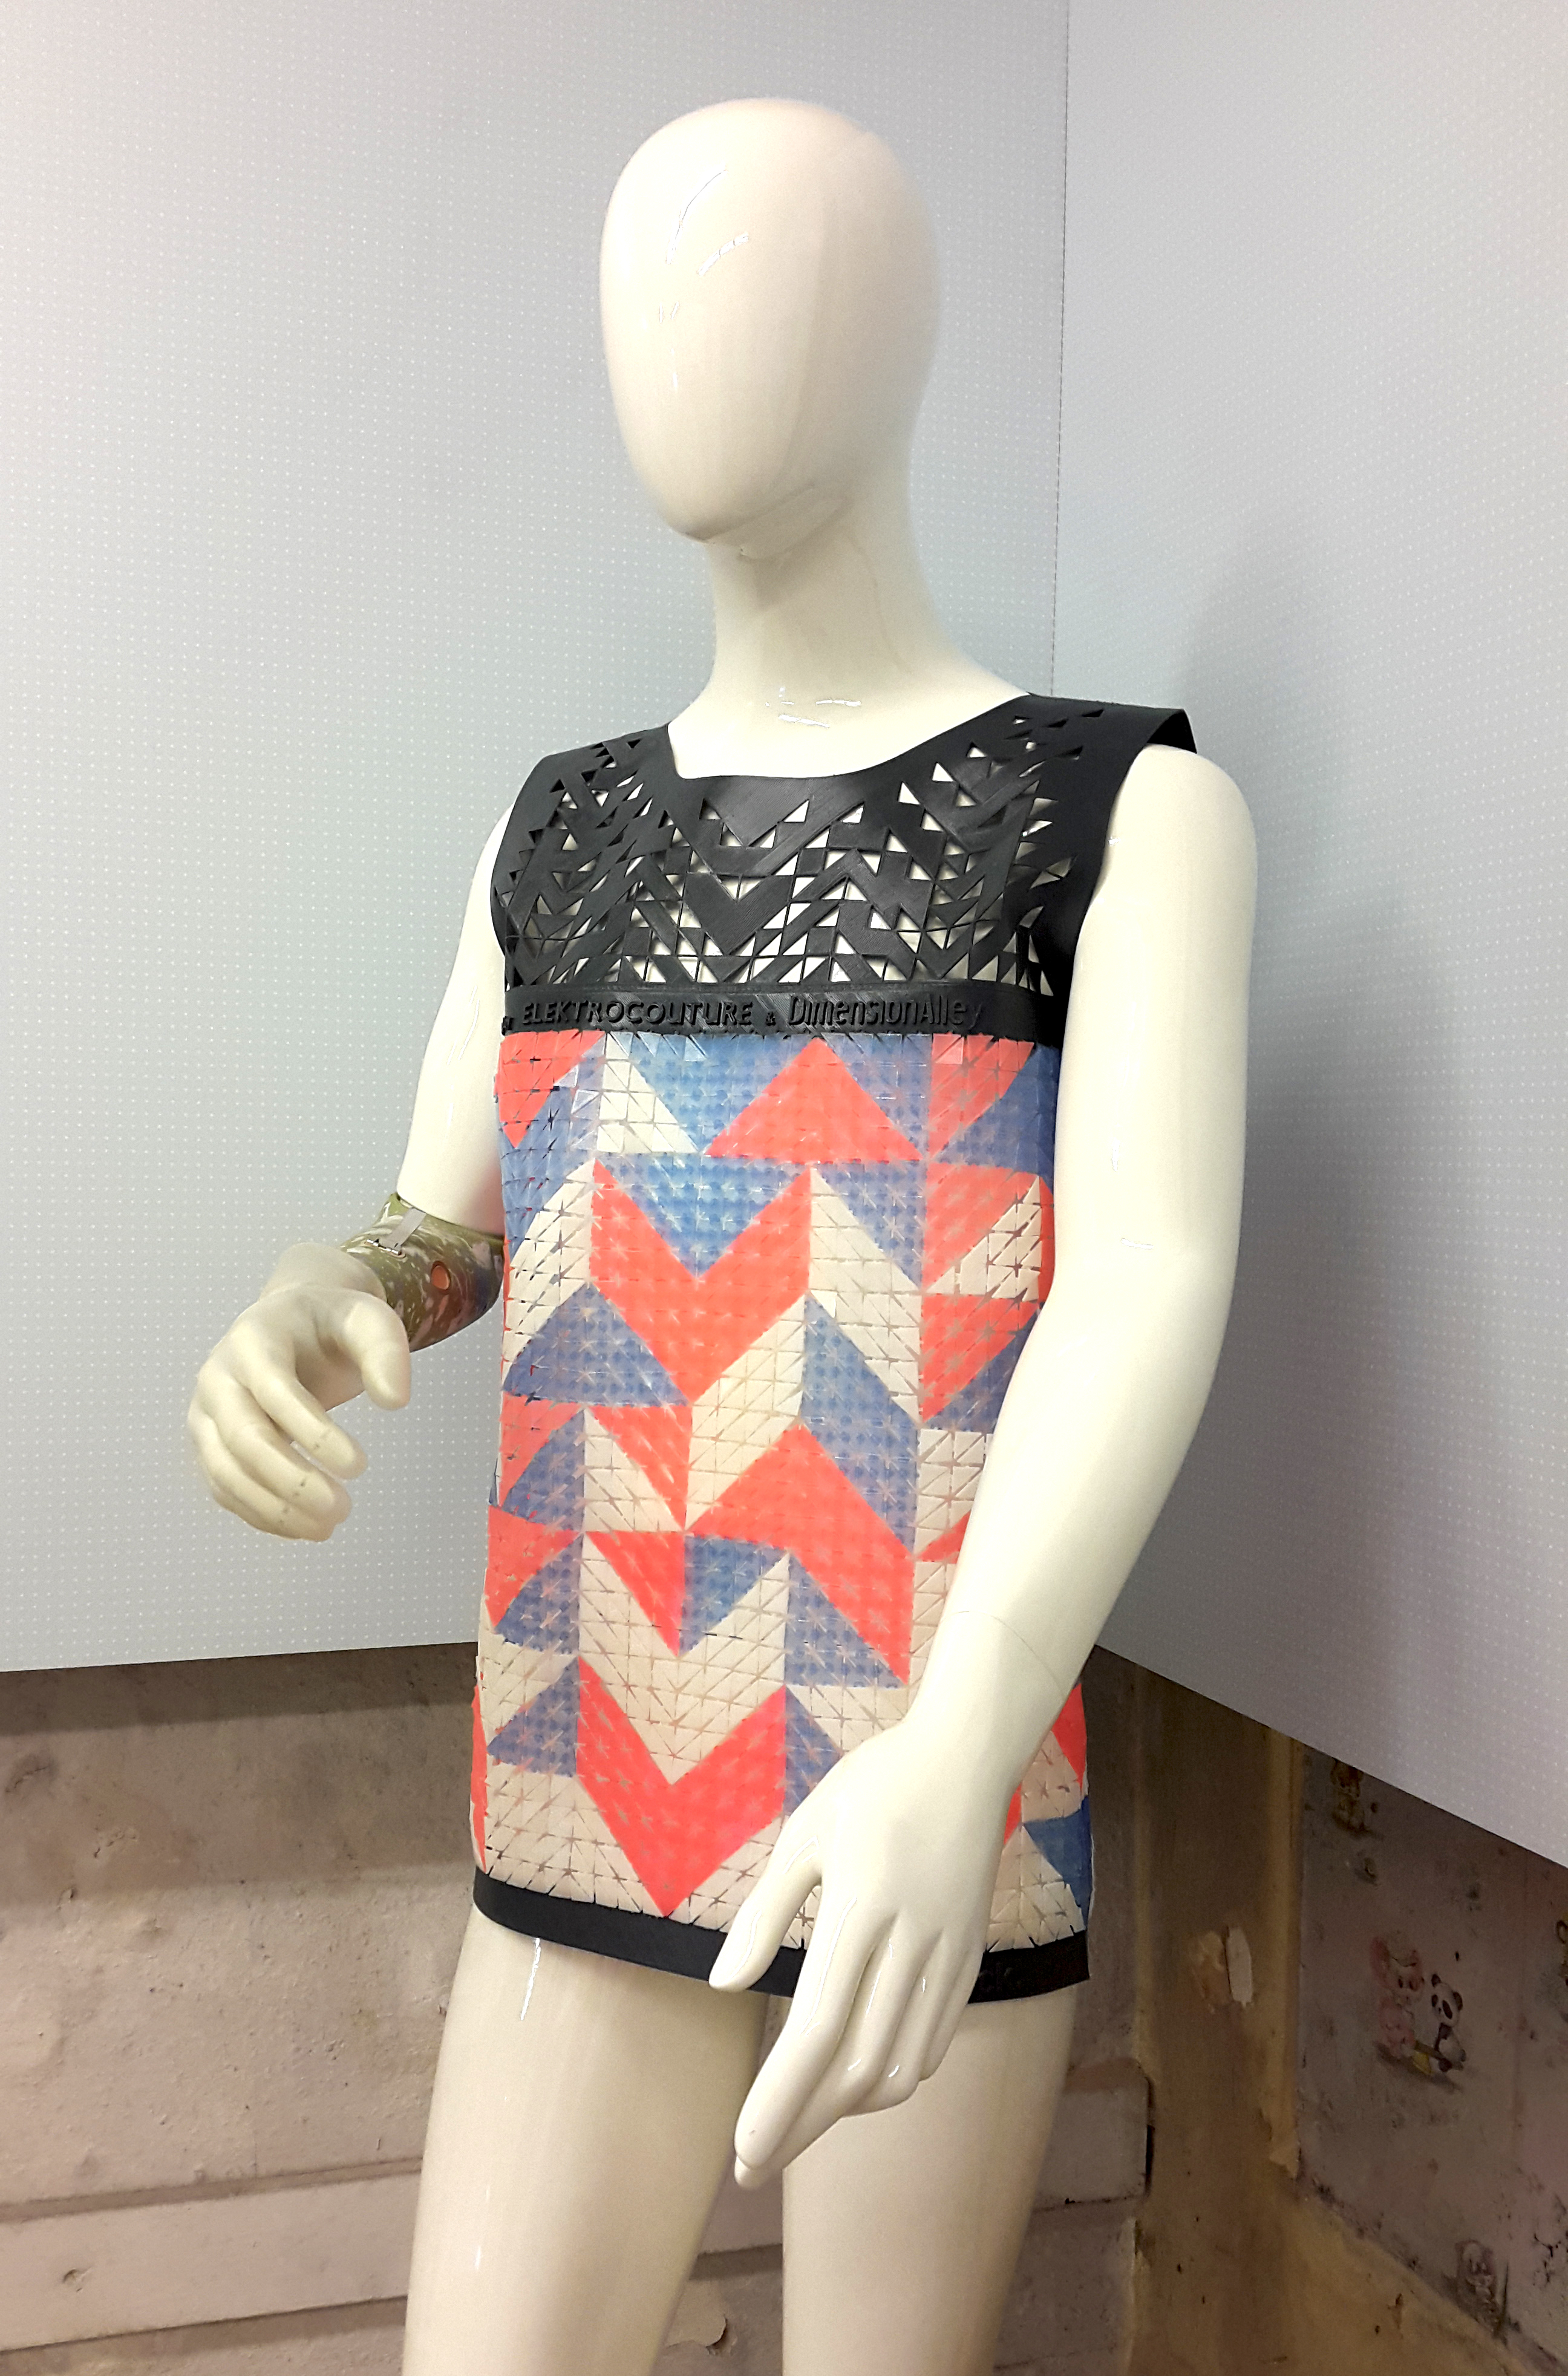
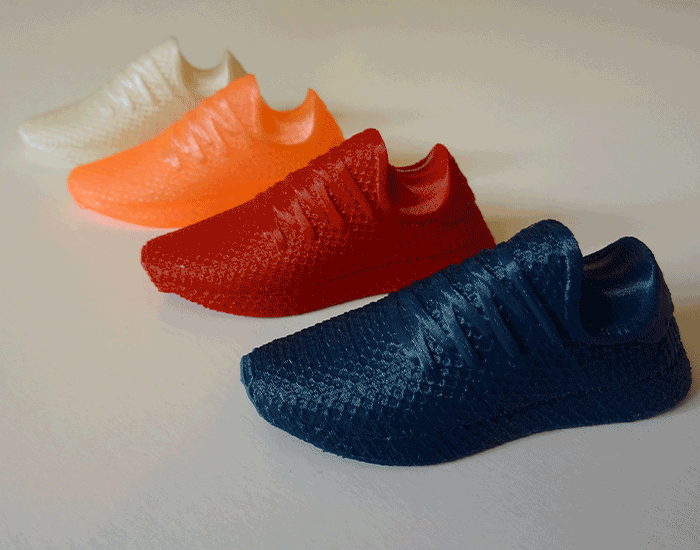
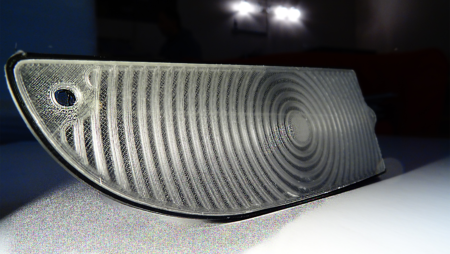
Hearing the wonderful news we started experimenting with different 3D printable chain mail-patterns (e.g. this pattern from Thingiverse) as well as various materials from flexible and transparent PLA to the new fully compostable WillowFlex. During our first official briefing we discussed these test pieces and Lisa immediately fell in love with the chain mail-pattern and it’s flexibility. So she decided to pick up the interlocking-mechanism for the shirt while the hexagon-shape of the original design was replaced by a triangle-shape in order to resemble an already existing prosthetic’s pattern from Ottobock (see above). The triangle-chain mail pieces would be printed in lovely, translucent crystal colours: orange, blue, and white PLA. The top part as well as the strip on the bottom of the shirt would be made with grey WillowFlex (both from 3Dk.berlin). Furthermore we received the 2D pattern based on the mannequin’s measurements and the deadline 9th of March.
The Challenge
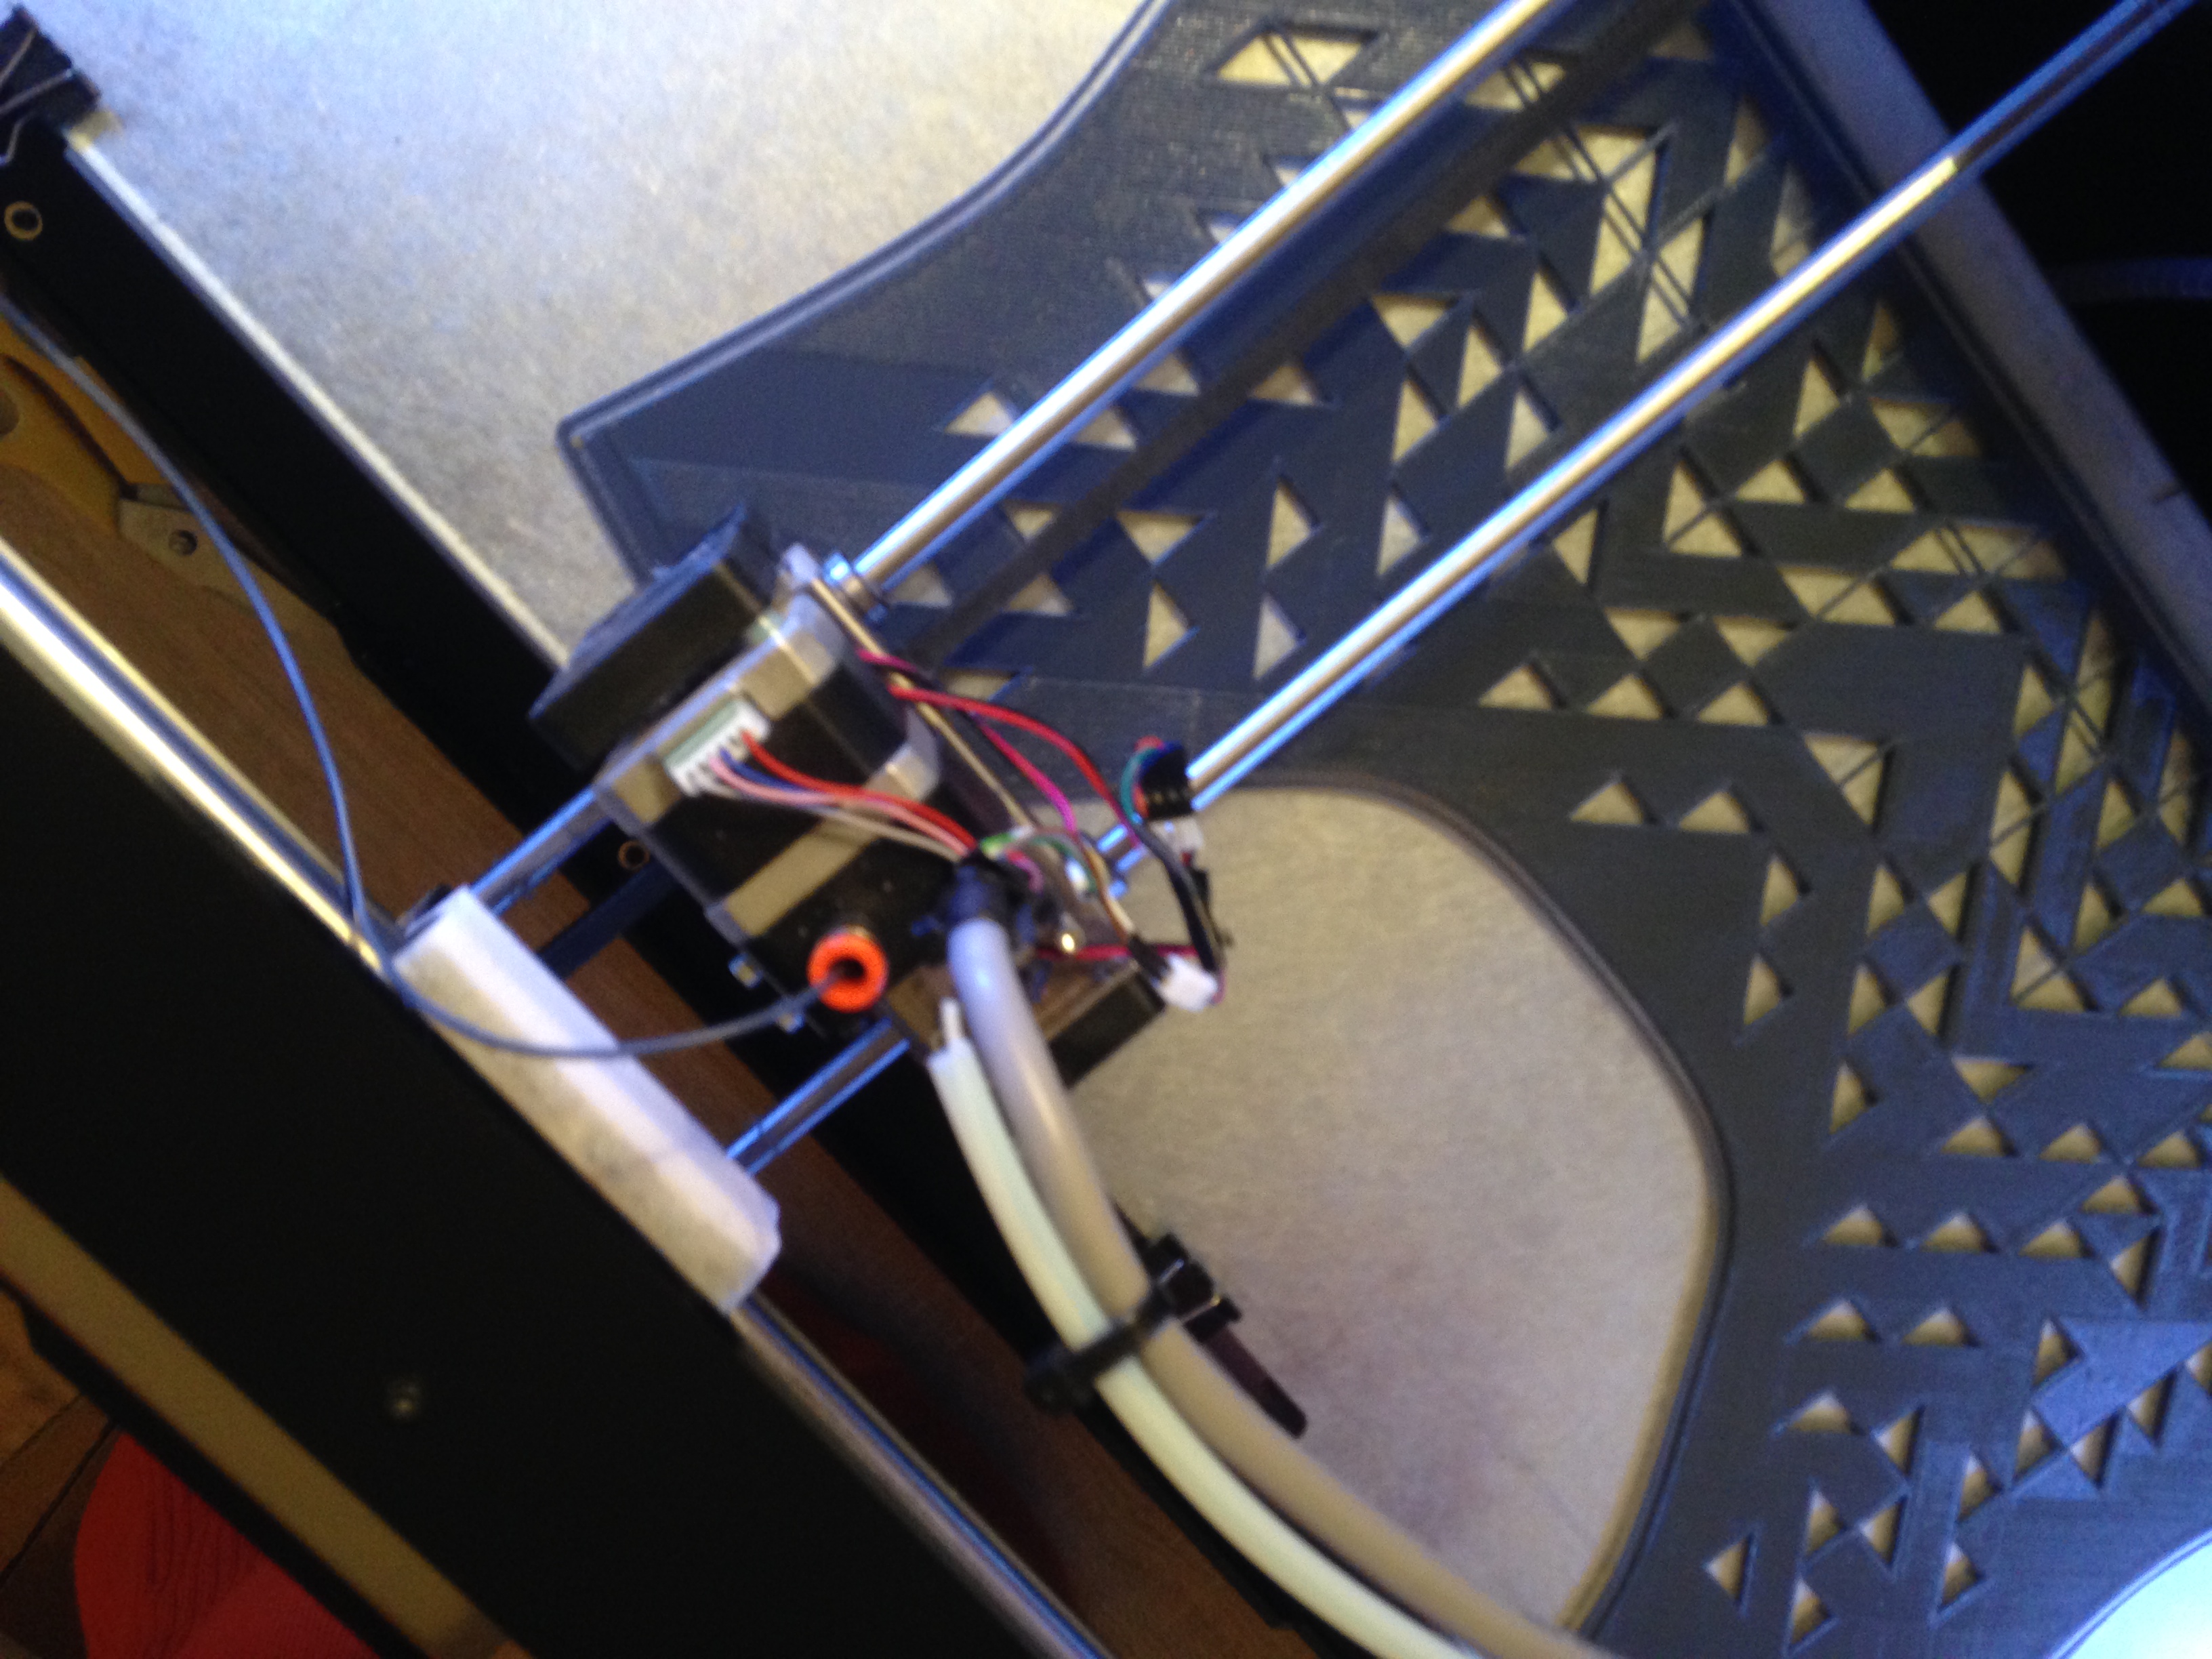
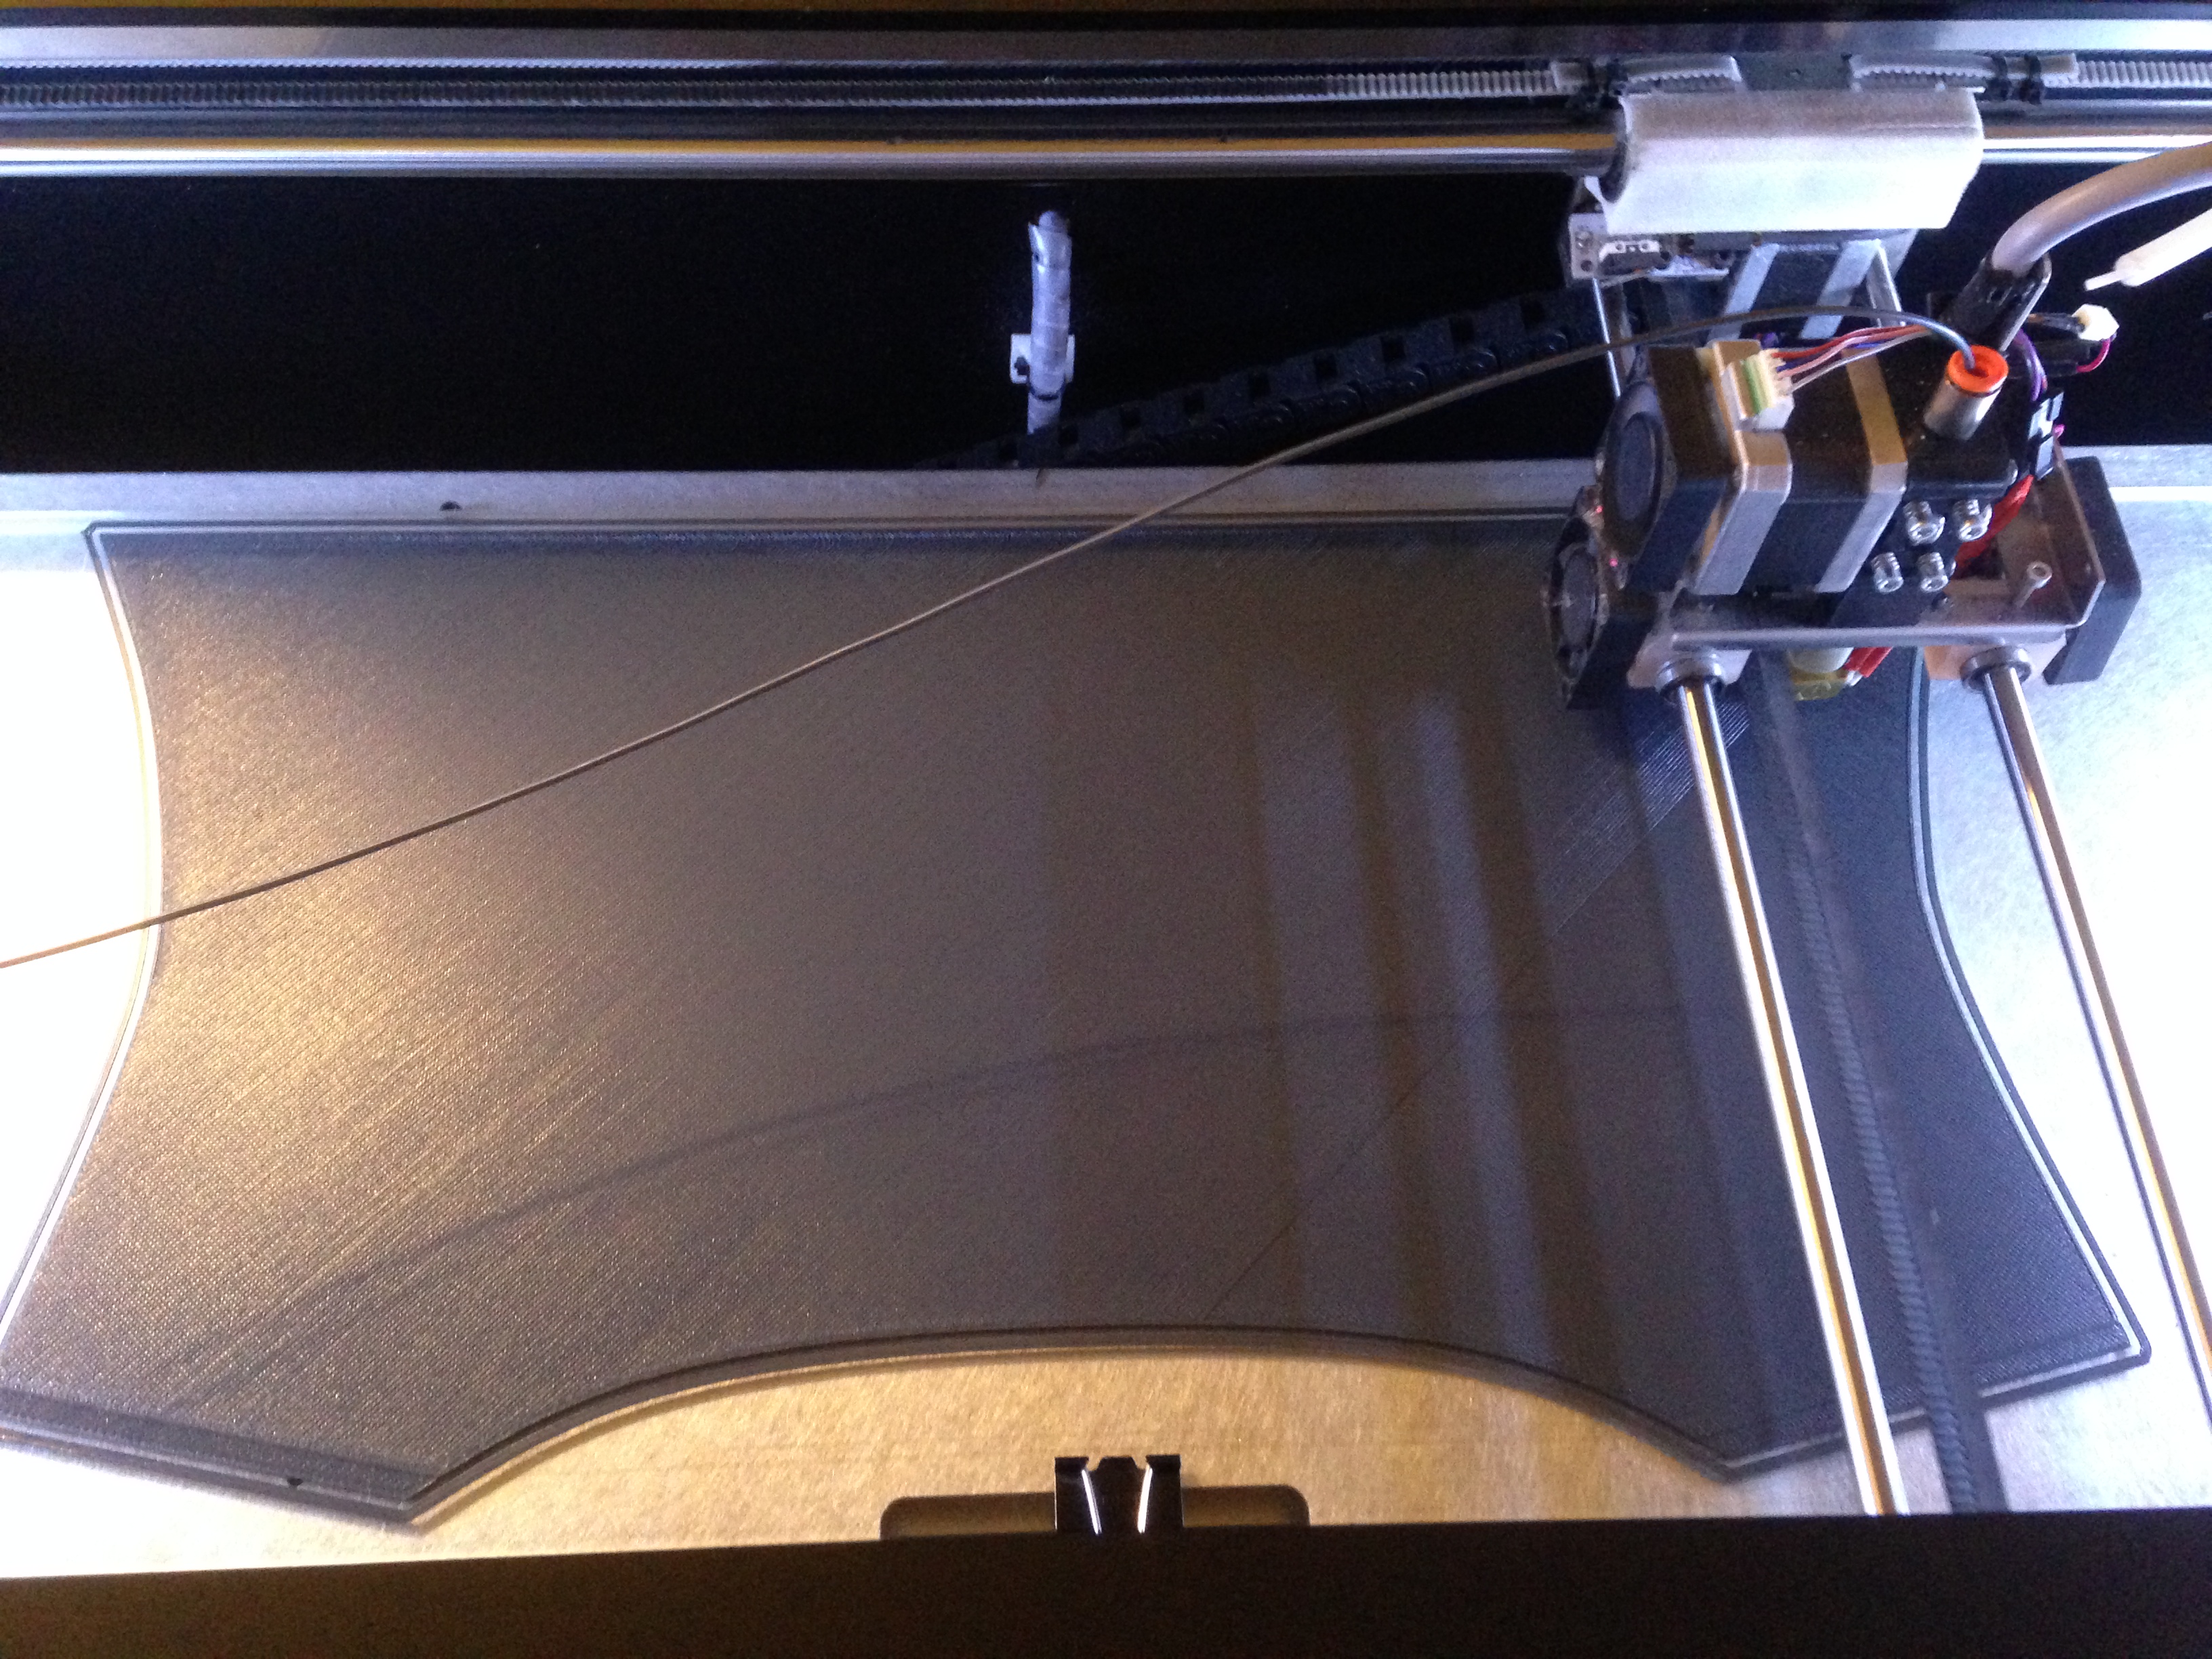
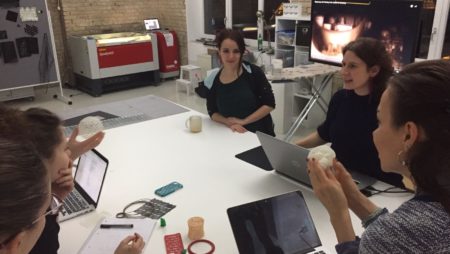
To meet this ambitious deadline we immediately got started on the men’s shirt. But since we were new in the field of interlocking-chain mail design and 3D printed fashion in general we had do our design, development and continuous improvement of the techniques on the fly. This has to be one of the greatest advantages of 3D printing, because there is no real time gap between designing and testing a small part. It’s in fact design thinking through prototyping. For example, occasionally colour differences between the triangle-chain mail pieces occurred, probably due to under-extrusion as the machines were running nearly 24/7 and of some of the very small connector parts needed a lot of small movement. But the brief was clear – fashion doesn’t like inconsistent variations in tones within a pattern – getting the colour right was very important. It can be very difficult to ensure that the machines print with an exactly uniform amount of flow, and even the colours themselves play a role in this. So we levelled the build plates again, stuck with one machine for one colour and achieved the right result.
Montage
The second, and maybe even more important challenge was to join together and strengthen the connection-links of the chain mail pieces so it could support it’s own weight and survive a 10 hour-flight in a suitcase without breaking apart.
Did you know that to create a chainmail shirt by hand it can take around 8oo hours to assemble it? Our initial assumption was that by using a 3D printer, and with clever design of the connectors between the sections, we would cut the hand assembly time to just a few hour. However, in order for the links to stay connected the link sticks had to fit snugly into the open topped hoops so we had to make the connection opening quite tight. The result was that the sticks had to be forced a little to connect them, and at first they did not always survive.
Warmth was the answer. A pair of tweezers dipped into hot water to warm the tips helped to soften the links so we could stretch and manipulate them. What really helped us and the project’s progress was actually an accident. Being too impatient to wait for the Sharebot NG’s heated glass build plate to cool down, we tried to remove the printed pieces too early, and realized how the still flexible warm PLA connector hoops could be stretched open, the stick connectors quickly connected, and the hoops then squeezed tightly shut. Quick connecting without weakening the integrity of the parts!
We also grouped together larger, like coloured, sections of the pattern by simply arranging them carefully together in our slicer, Simplify3D. Printing them in one shot saved a lot of time and breakage. This would definitely be a design improvement for similar projects.
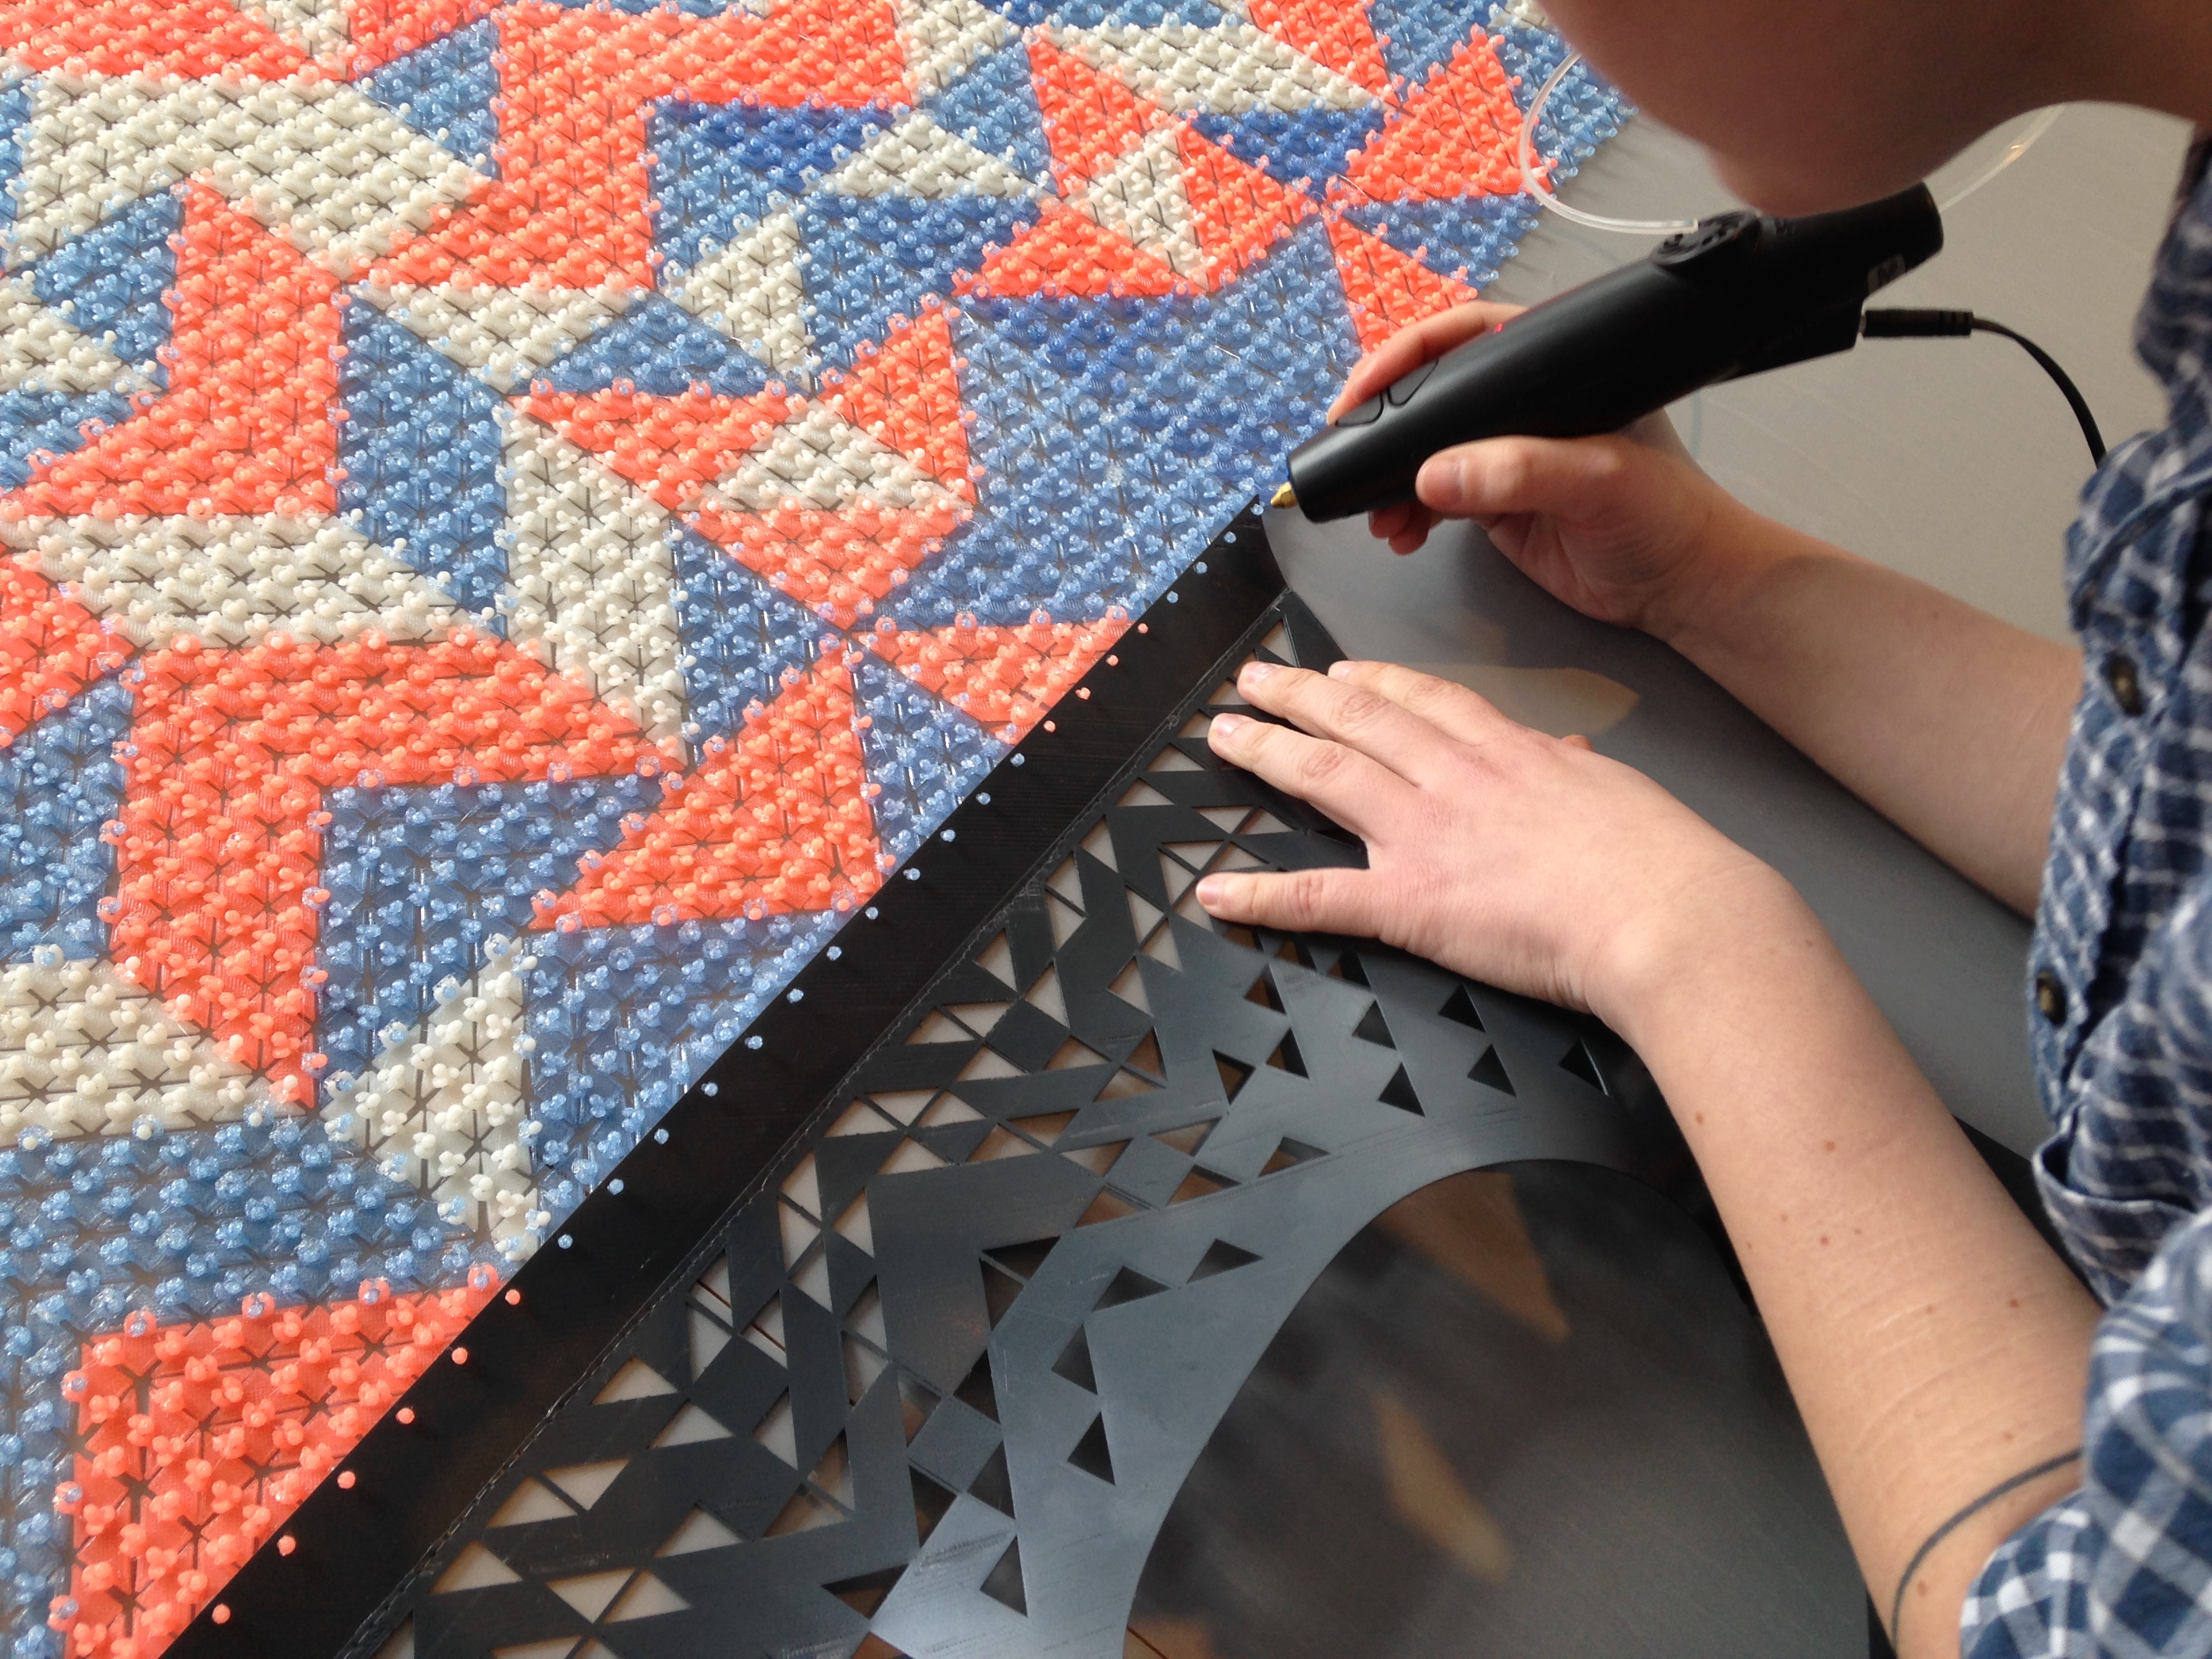
In case of a link broke anyway the 3D Doodler pen came in super-handy for fixing them and also to support areas with the most stress – without leaving ugly glue stains.
The compostible willow flex material was super easy to work with as far as flexible FDM materials go, with little adjustment to the tension screws on the feeder to get a good flow. Like all flex filaments the first layer is critical and the build plate had to be very well levelled.
After numerous working hours, solution finding-brainstorming sessions, re-briefings, and fittings on real people as well as mannequins the men’s shirt was ready to travel the world. If you follow us then you already know that it arrived safe and sound together with Lisa at Ottobock’s booth in Austin. What a relief!
The Realization in Numbers
- 4 Briefing and debriefing sessions
- 6 Fittings in total (3 on real people and 3 on mannequins)
- 8 Design hours
- 108 Printing hours (incl. fail prints)
- 1.200 g Filament used (300 g/colour)
- 50 Assembly hours
- 3.584 Triangles
Tools, materials and machines
- 3D modelling in Onshape
- Pattern creation in Adobe Illustrator – exported and extruded in Onshape
- Simplify 3D for slicing and arranging pattern groups
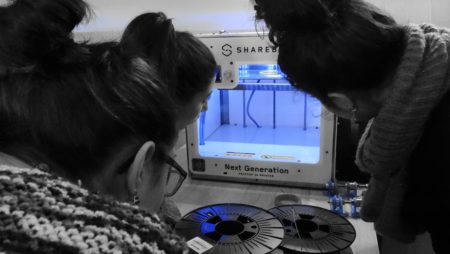
- 3D printers by Sharebot
- Filament from 3dk Berlin
3D Printed Fashion: Challenging & Rewarding
Realizing our third fashion project together with the amazing team of ElektroCouture we can say that fashion is maybe one of the most challenging application fields of 3D printing but it is also one of the most rewarding ones. Creative solutions have to be found in order to overcome the various obstacles and to create something that fits, looks fashionable and is actually comfortable to wear. One lesson we take with us to move away from the starting point of a traditional 2D pattern for material. Using 3D printing to create 2D object is challenging and also limiting. For our next project we look for inspiration by directly designing for what the printers do best, 3D print!
Nevertheless we are more than excited about future fashion projects and in case of you need help in realizing your project we would be glad to hear from you via email, telephone, social media, or come by our Café personally.
See you next week to a new episode of our Feature Friday. Enjoy your weekend!

No Comment
You can post first response comment.