
Welcome back to our 13th Feature Friday and to an interesting topic for anyone who has been using a desktop 3D printer. Especially 3D printers that print in lower resolution leave distinct layer lines on your parts or around joins on connecting parts. That can sometimes look interesting and appealing but sometimes you want a smoother, more highly-finished look. There are various methods like sanding or using solvents like Acetone (only on ABS!) that can help you to produce a smooth finish but both processes are time consuming and/or toxic and/or can destroy the detail in your glossy surface. So this week we want to talk about Smooth On’s XTC-3D Brush-On Coating for 3D Printed Parts – a fast and easy-to-use finishing for your 3D prints.
XTC-3D is a two-part epoxy coating that does not melt plastic and can therefore be applied onto any 3D print. It works with basically every material from PLA, ABS, Laywood, powder printed parts, EPS, EPDM, and urethane foam to wood, plaster, fabric, cardboard and paper. But how does it work and which utensils do you need?
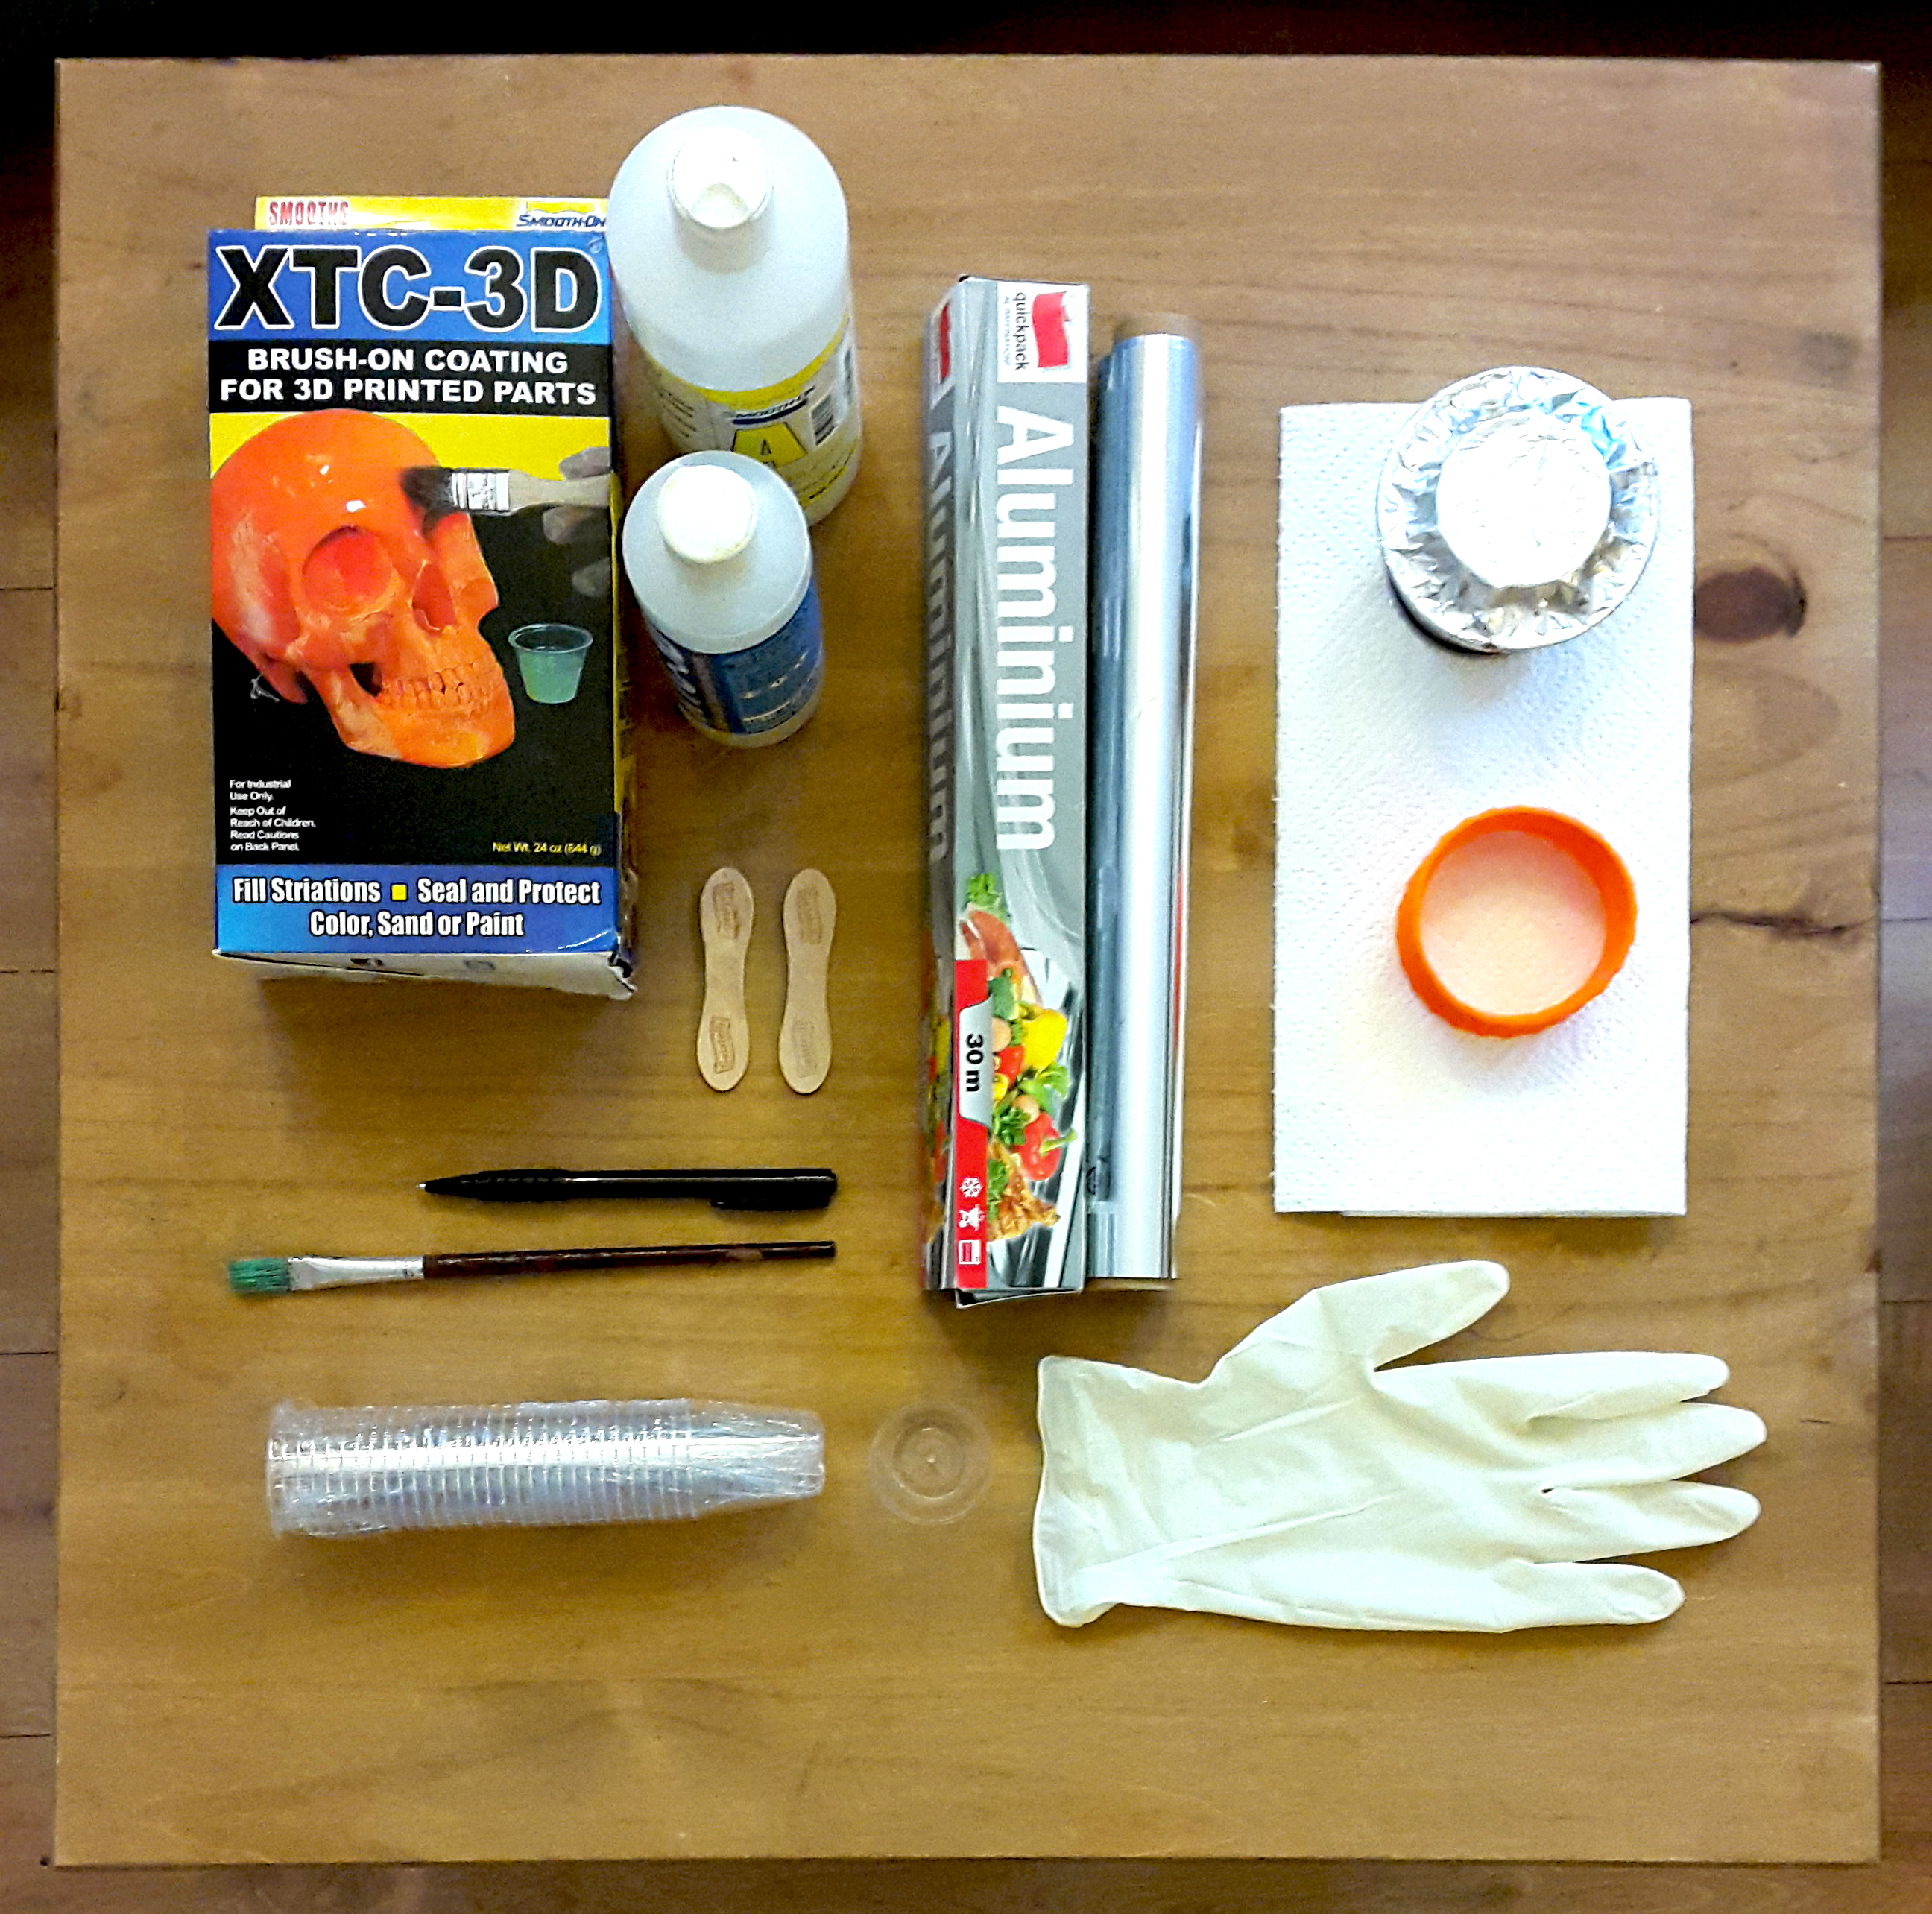
What you need:
- XTC-3D from Smooth On
- aluminium foil
- a brush (You can also use the included foam brush but we prefer a common paintbrush. It does the job well but watch out that the hairs are not loose.)
- silicone gloves
- a small plastic cup
- a pen
- small wooden sticks
- kitchen roll (in case of you spill something)
- an aluminium foil covered platform (for drying your coated object(s))
- the 3D printed object(s) you want to coat
6 easy steps to a glossy finish
- Take some aluminium foil and form a shallow basin with it – matt side out. It is important that the basin is large enough to provide enough space for letting the liquid spread out in order to increase the liquid’s surface and subsequently it’s pot life* (normally 10 min.).
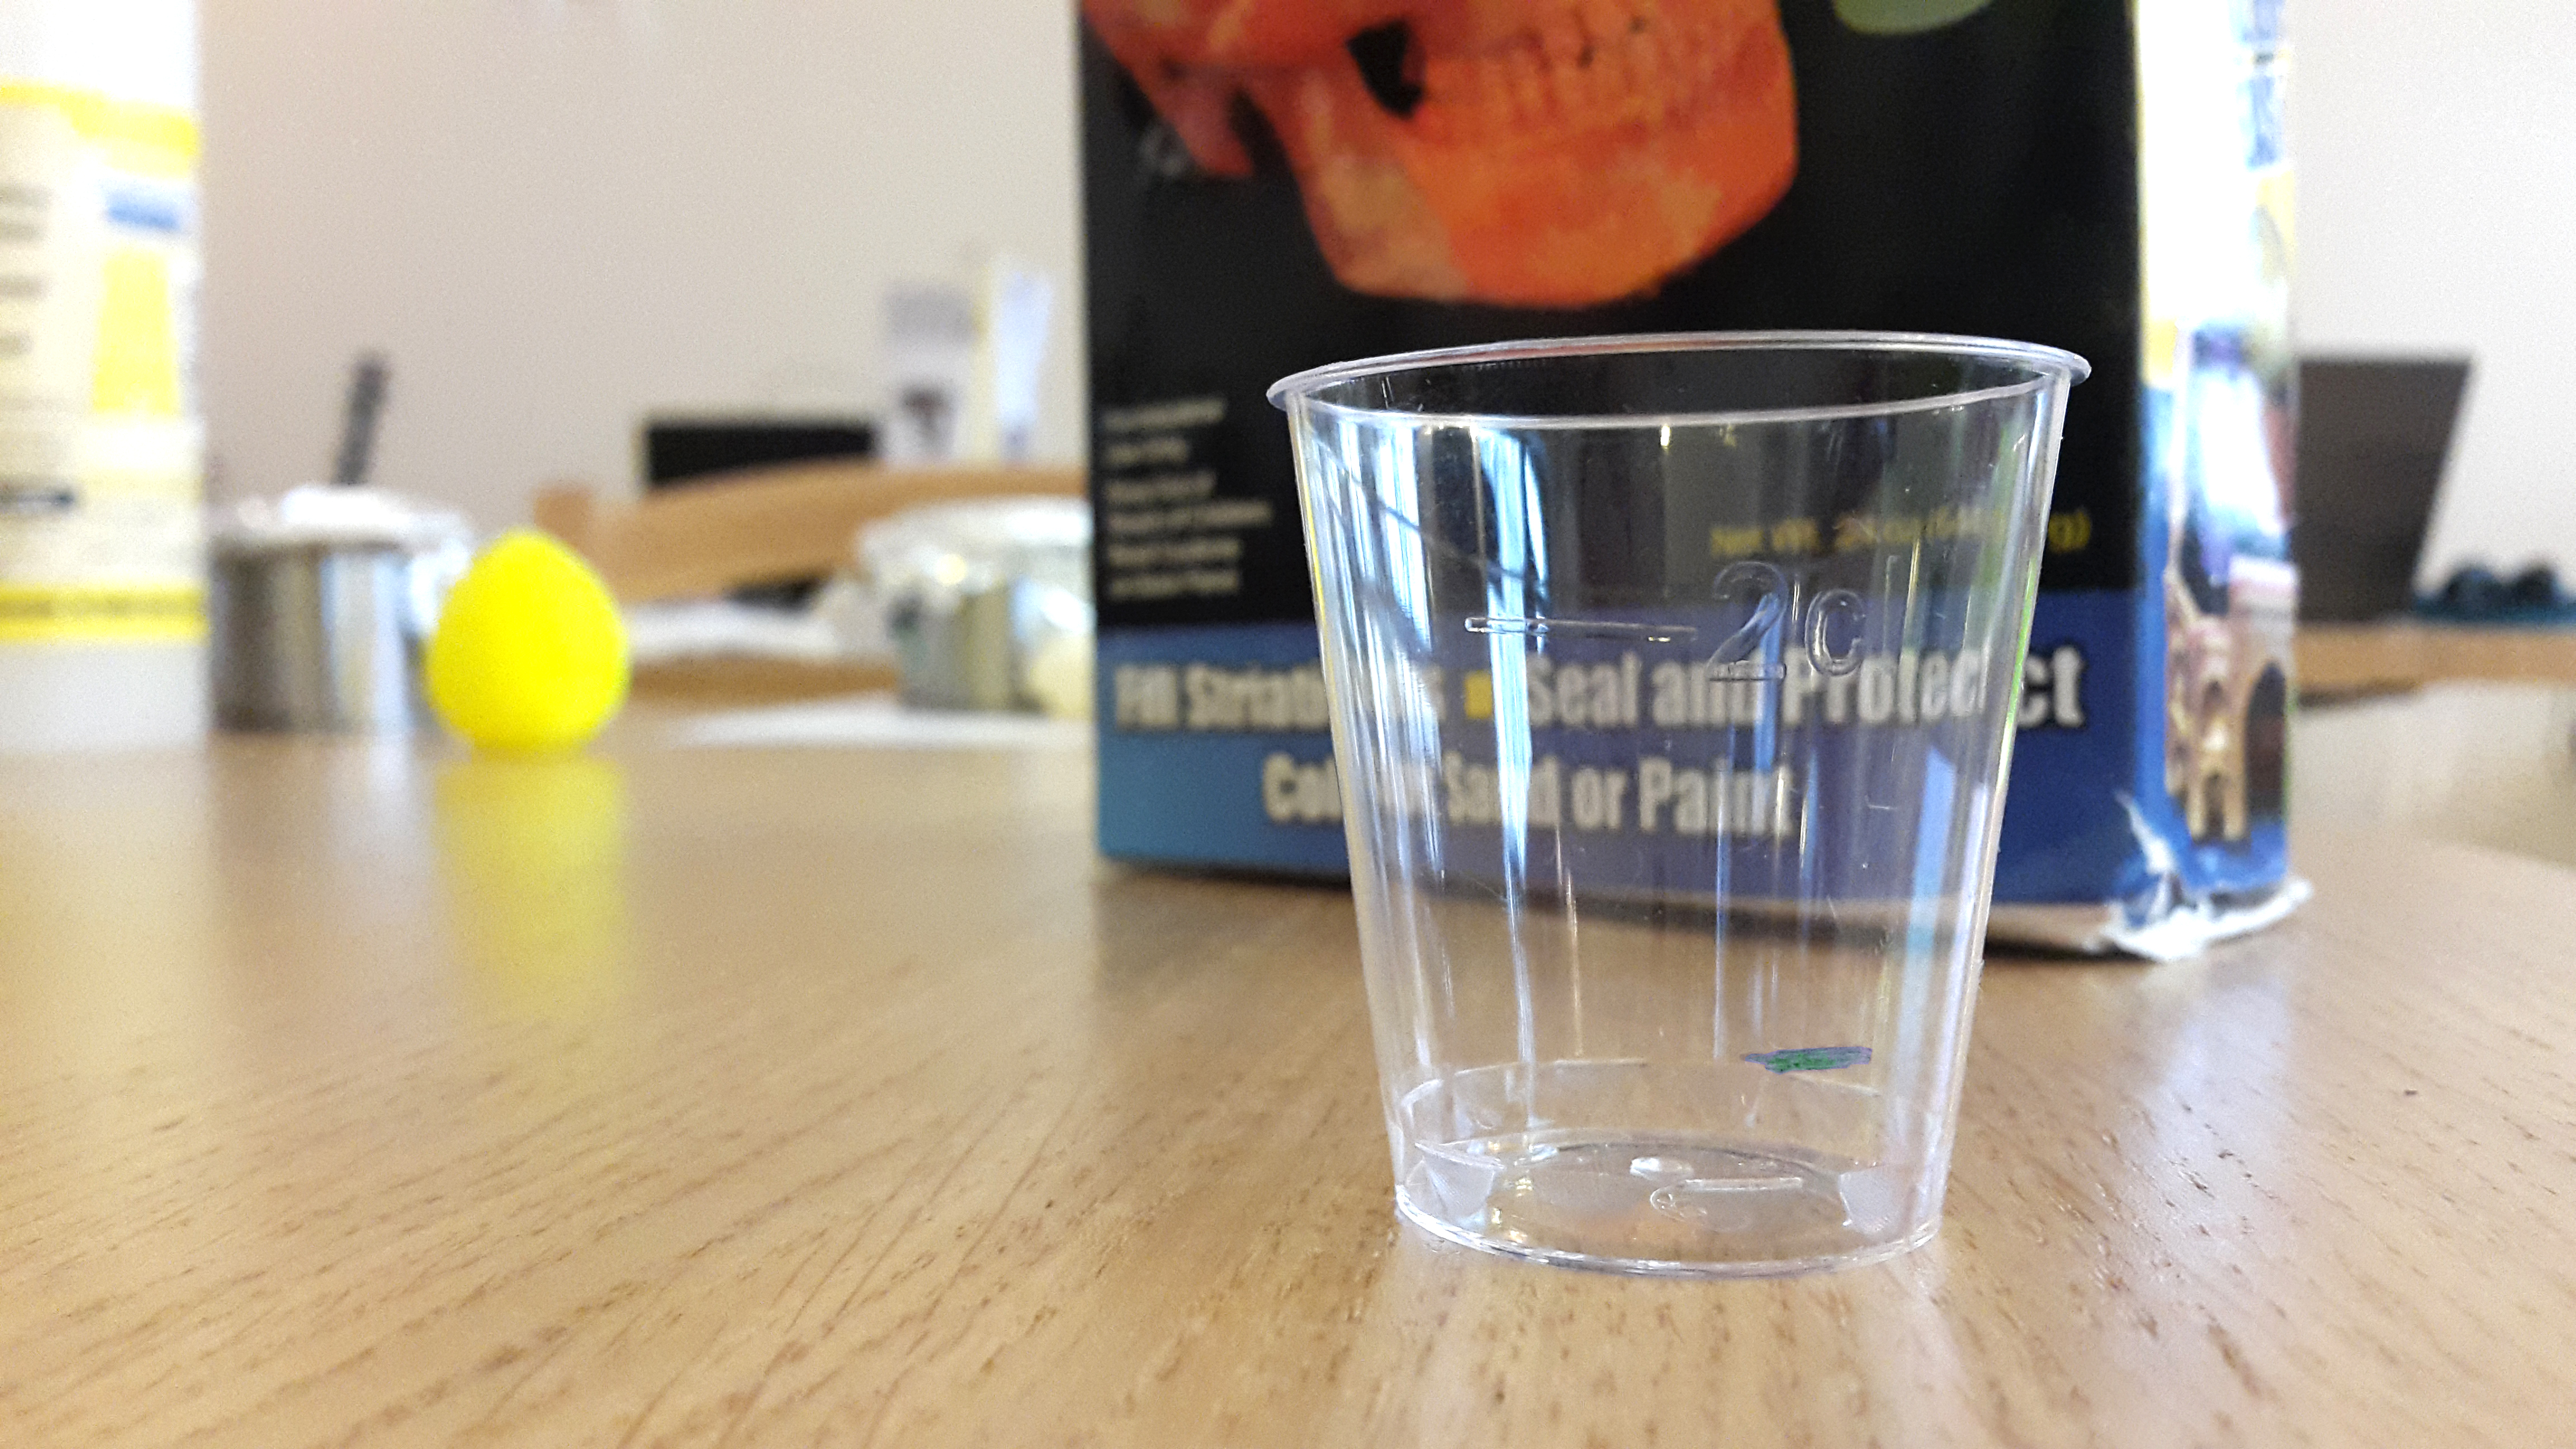
- Take the small plastic cup and draw a low reference line with the pen on it. This line shall help you to mix the two liquids in the right ratio without wasting, since a very little amount can already cover large surfaces.
- Now it is time to put on the gloves.
- Take one cup filled-up to the line with liquid B and two cups filled-up to the line with liquid A. Poor them in the aluminium basin and mix them well together with a wooden stick or the brush. Caution: Do not use a glass container to mix the liquids since they are exothermic and therefore can heat up the glass drastically.
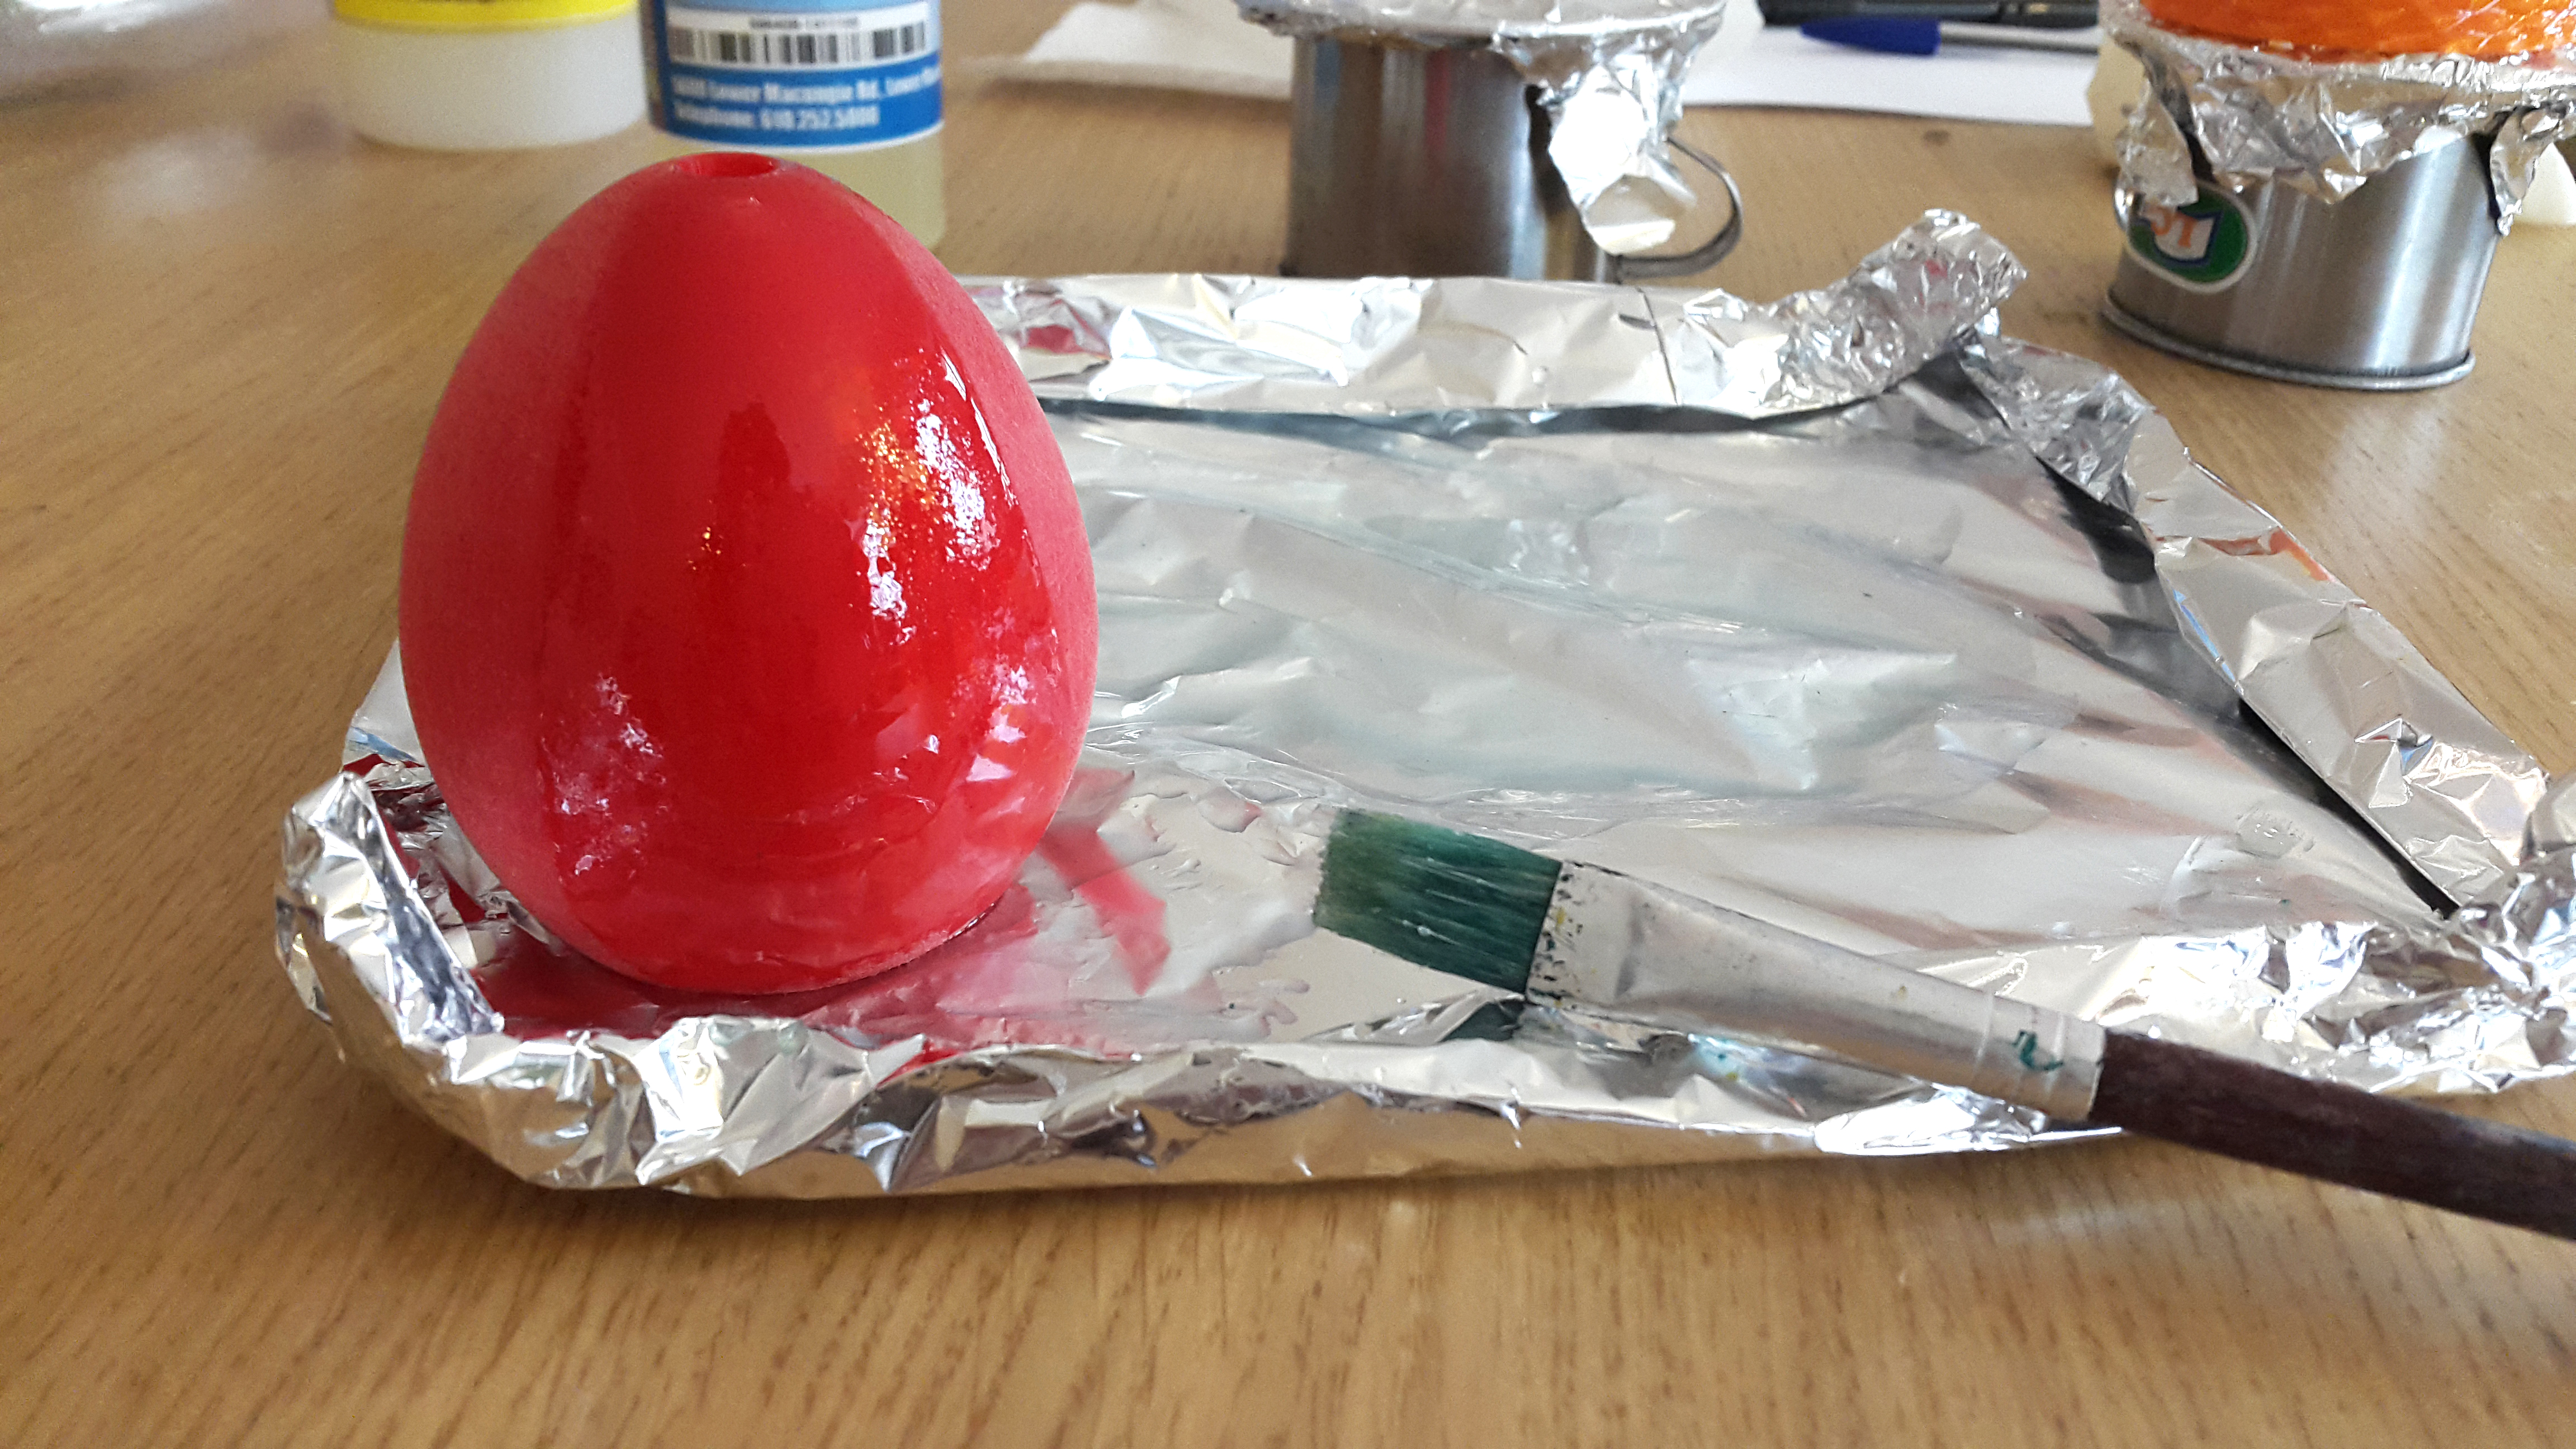
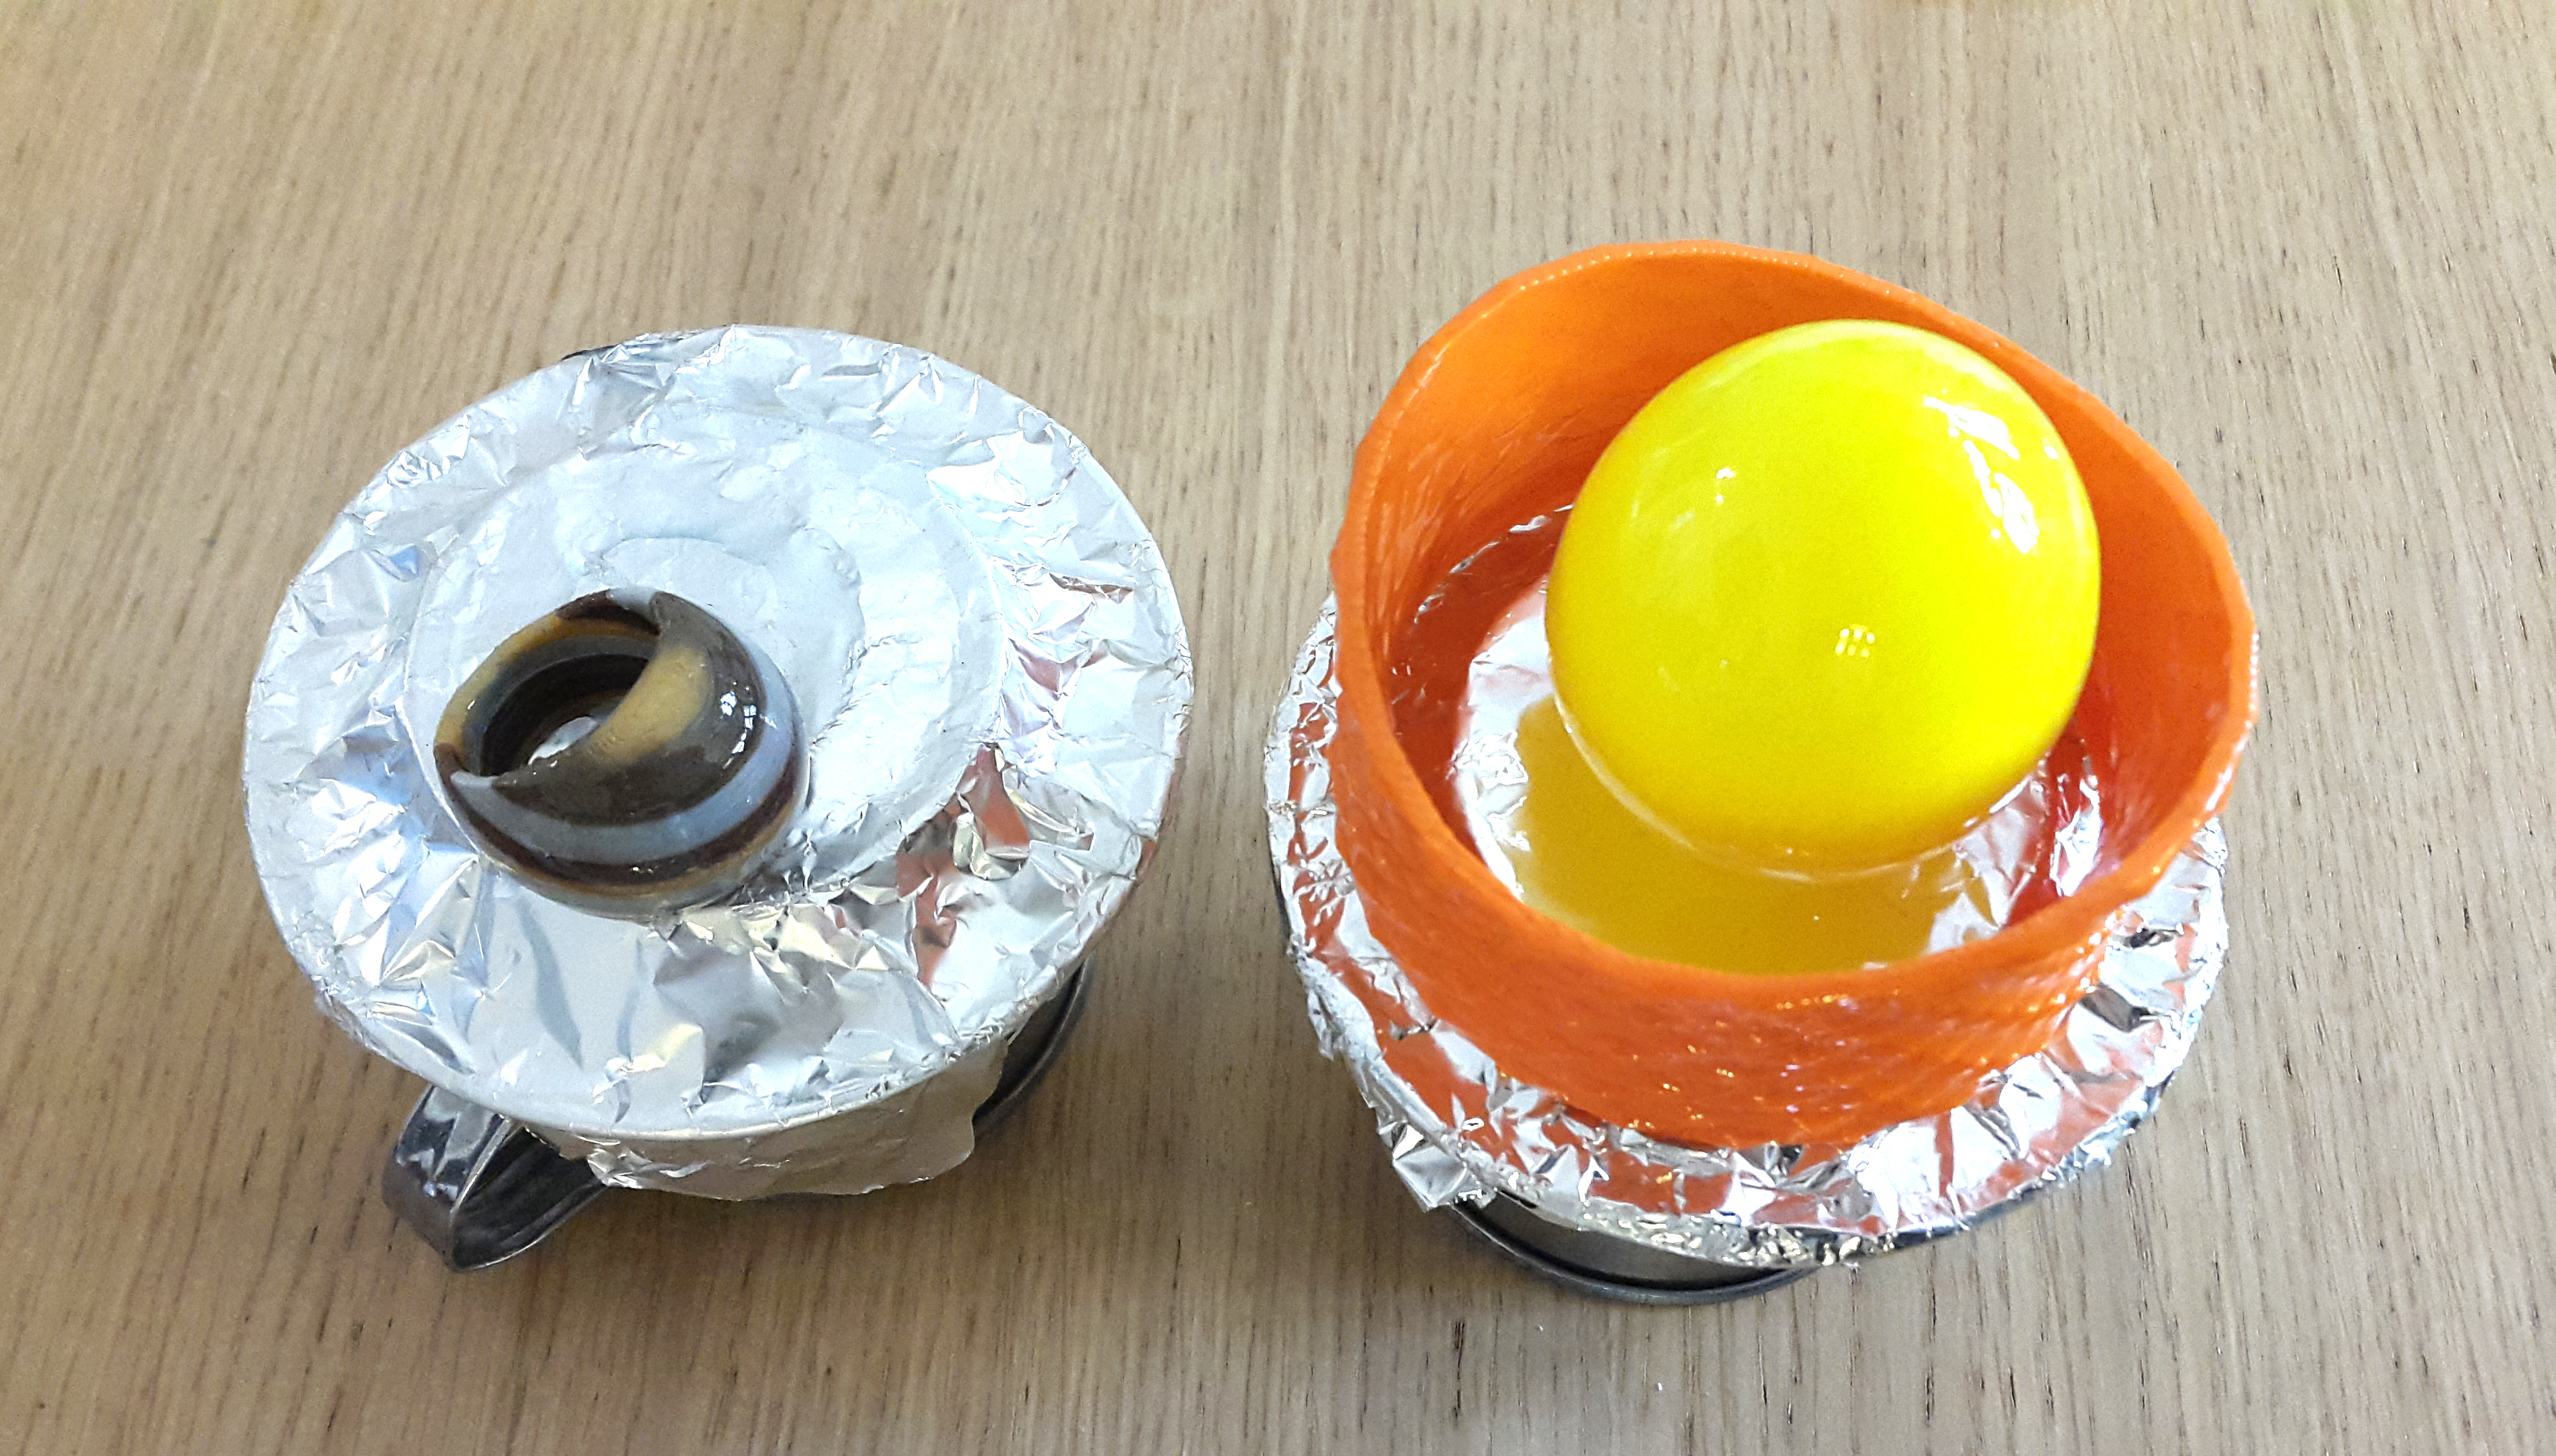
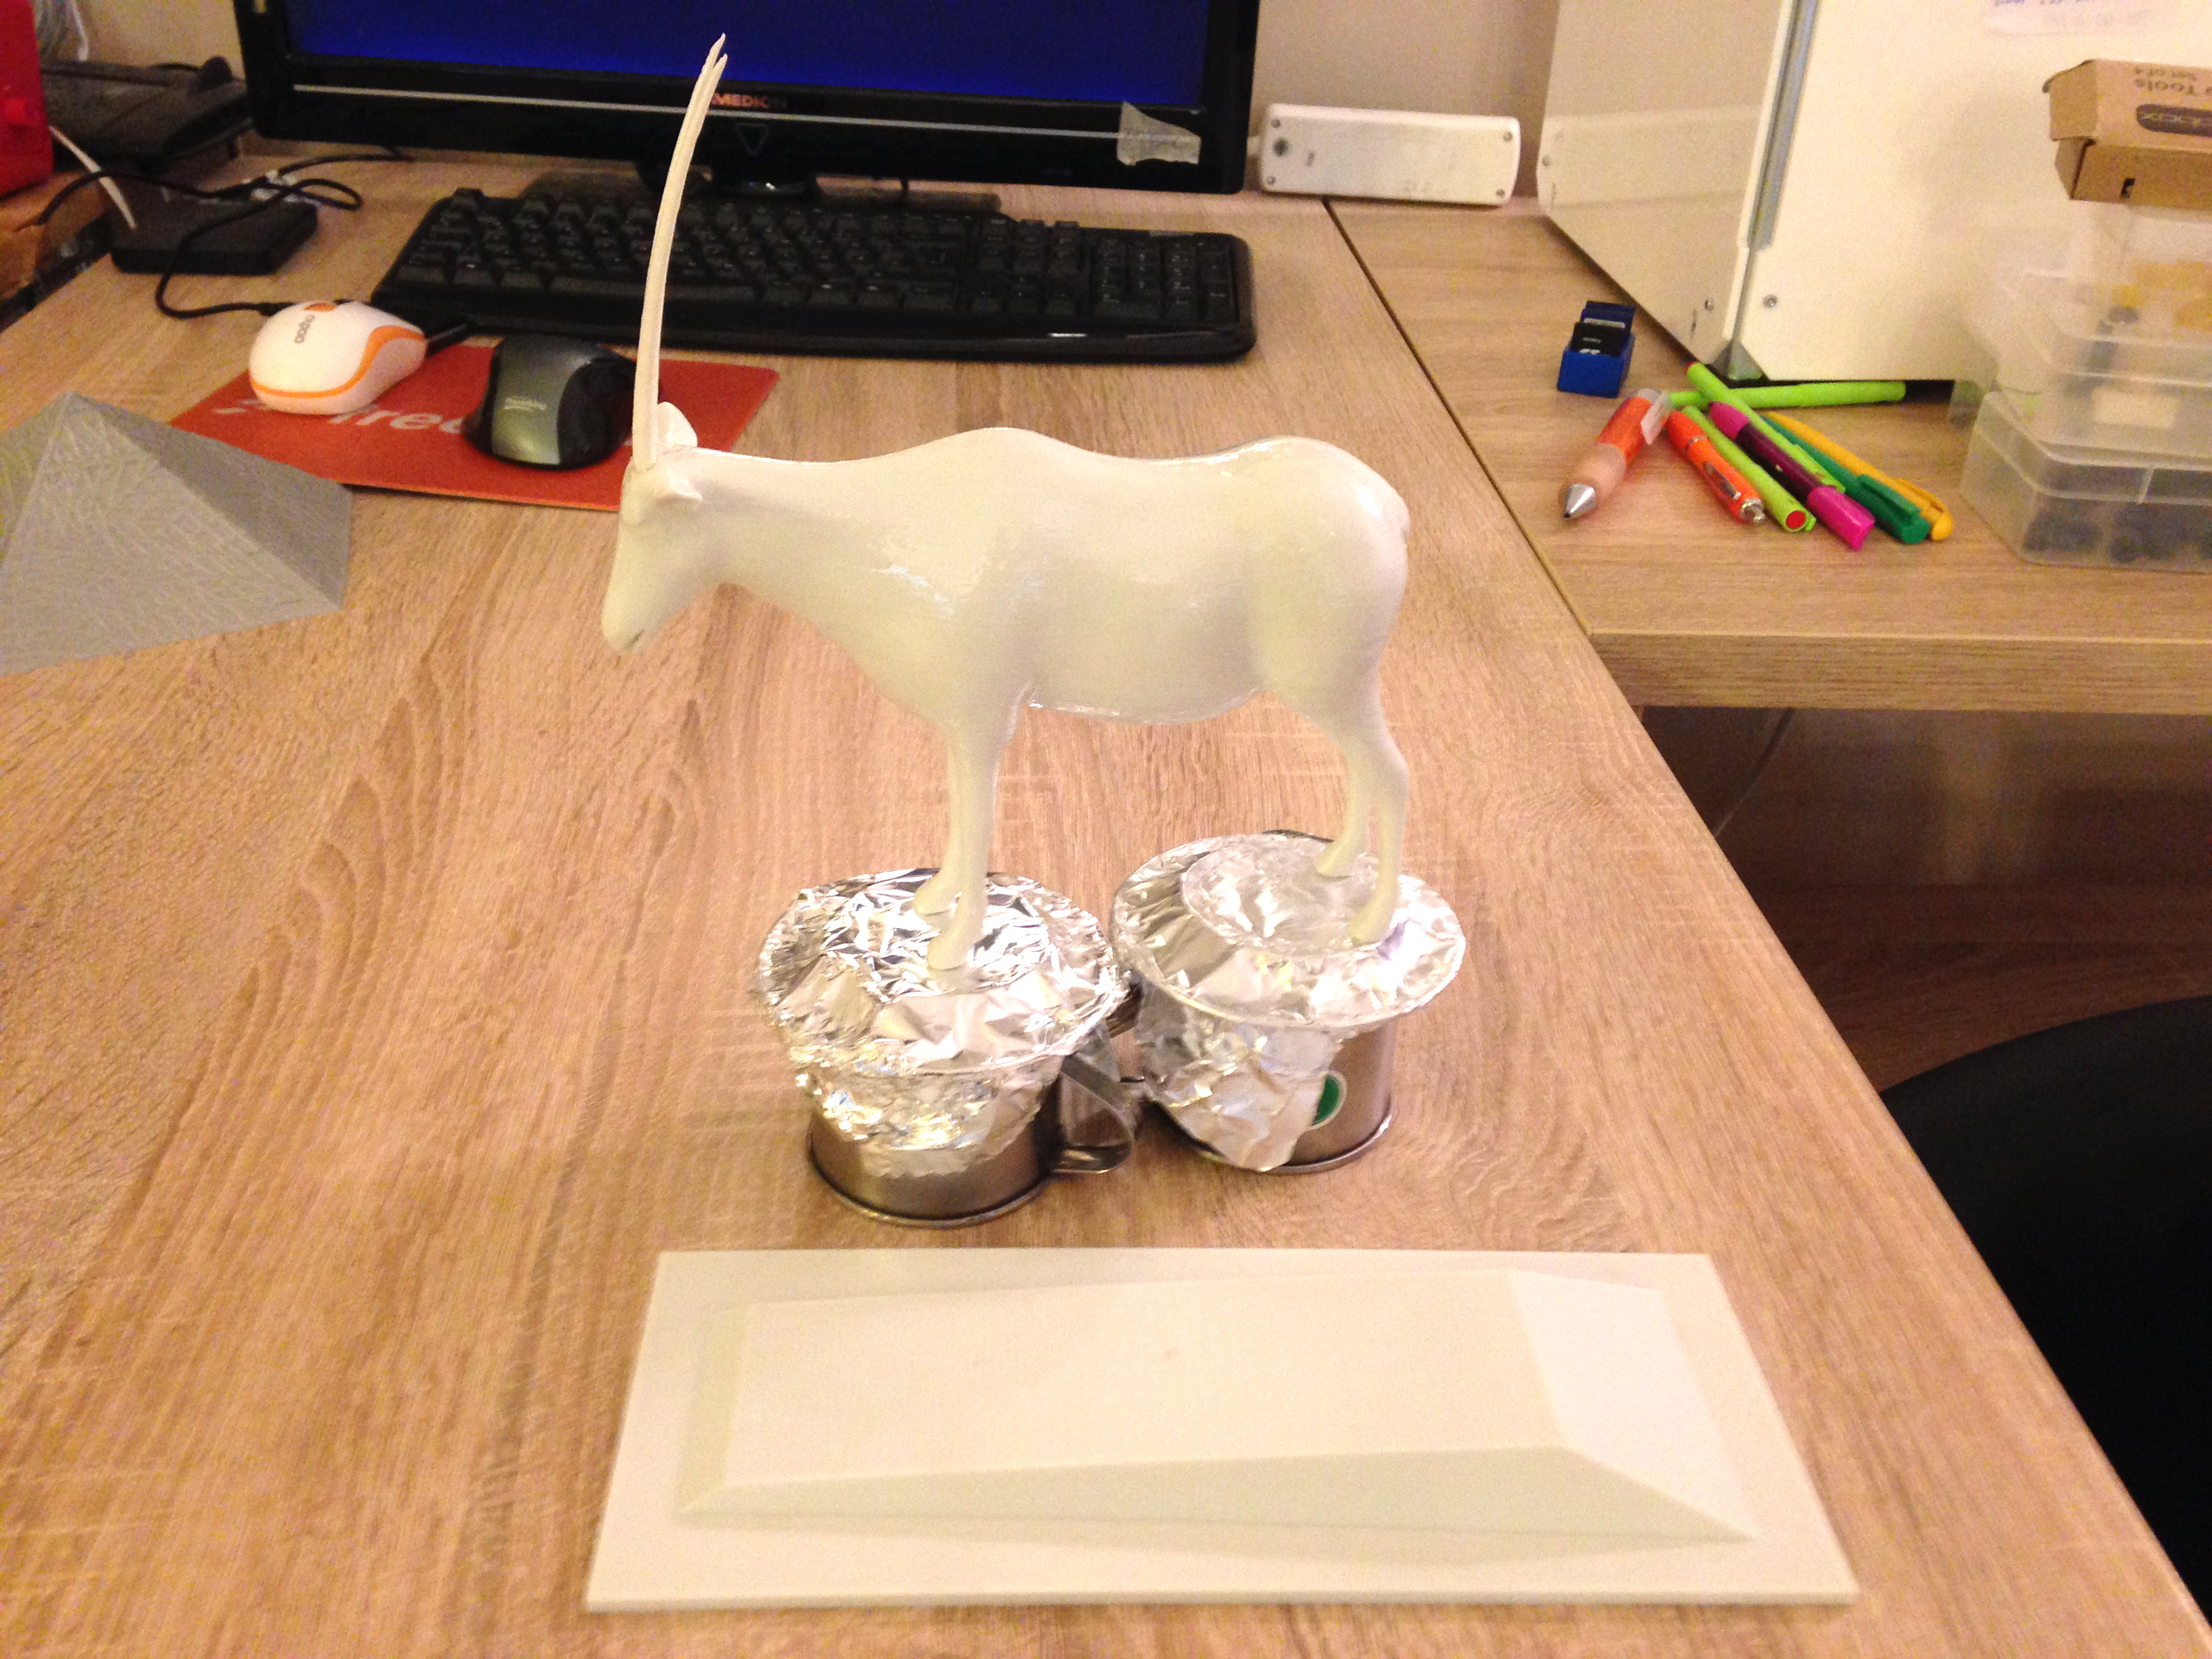
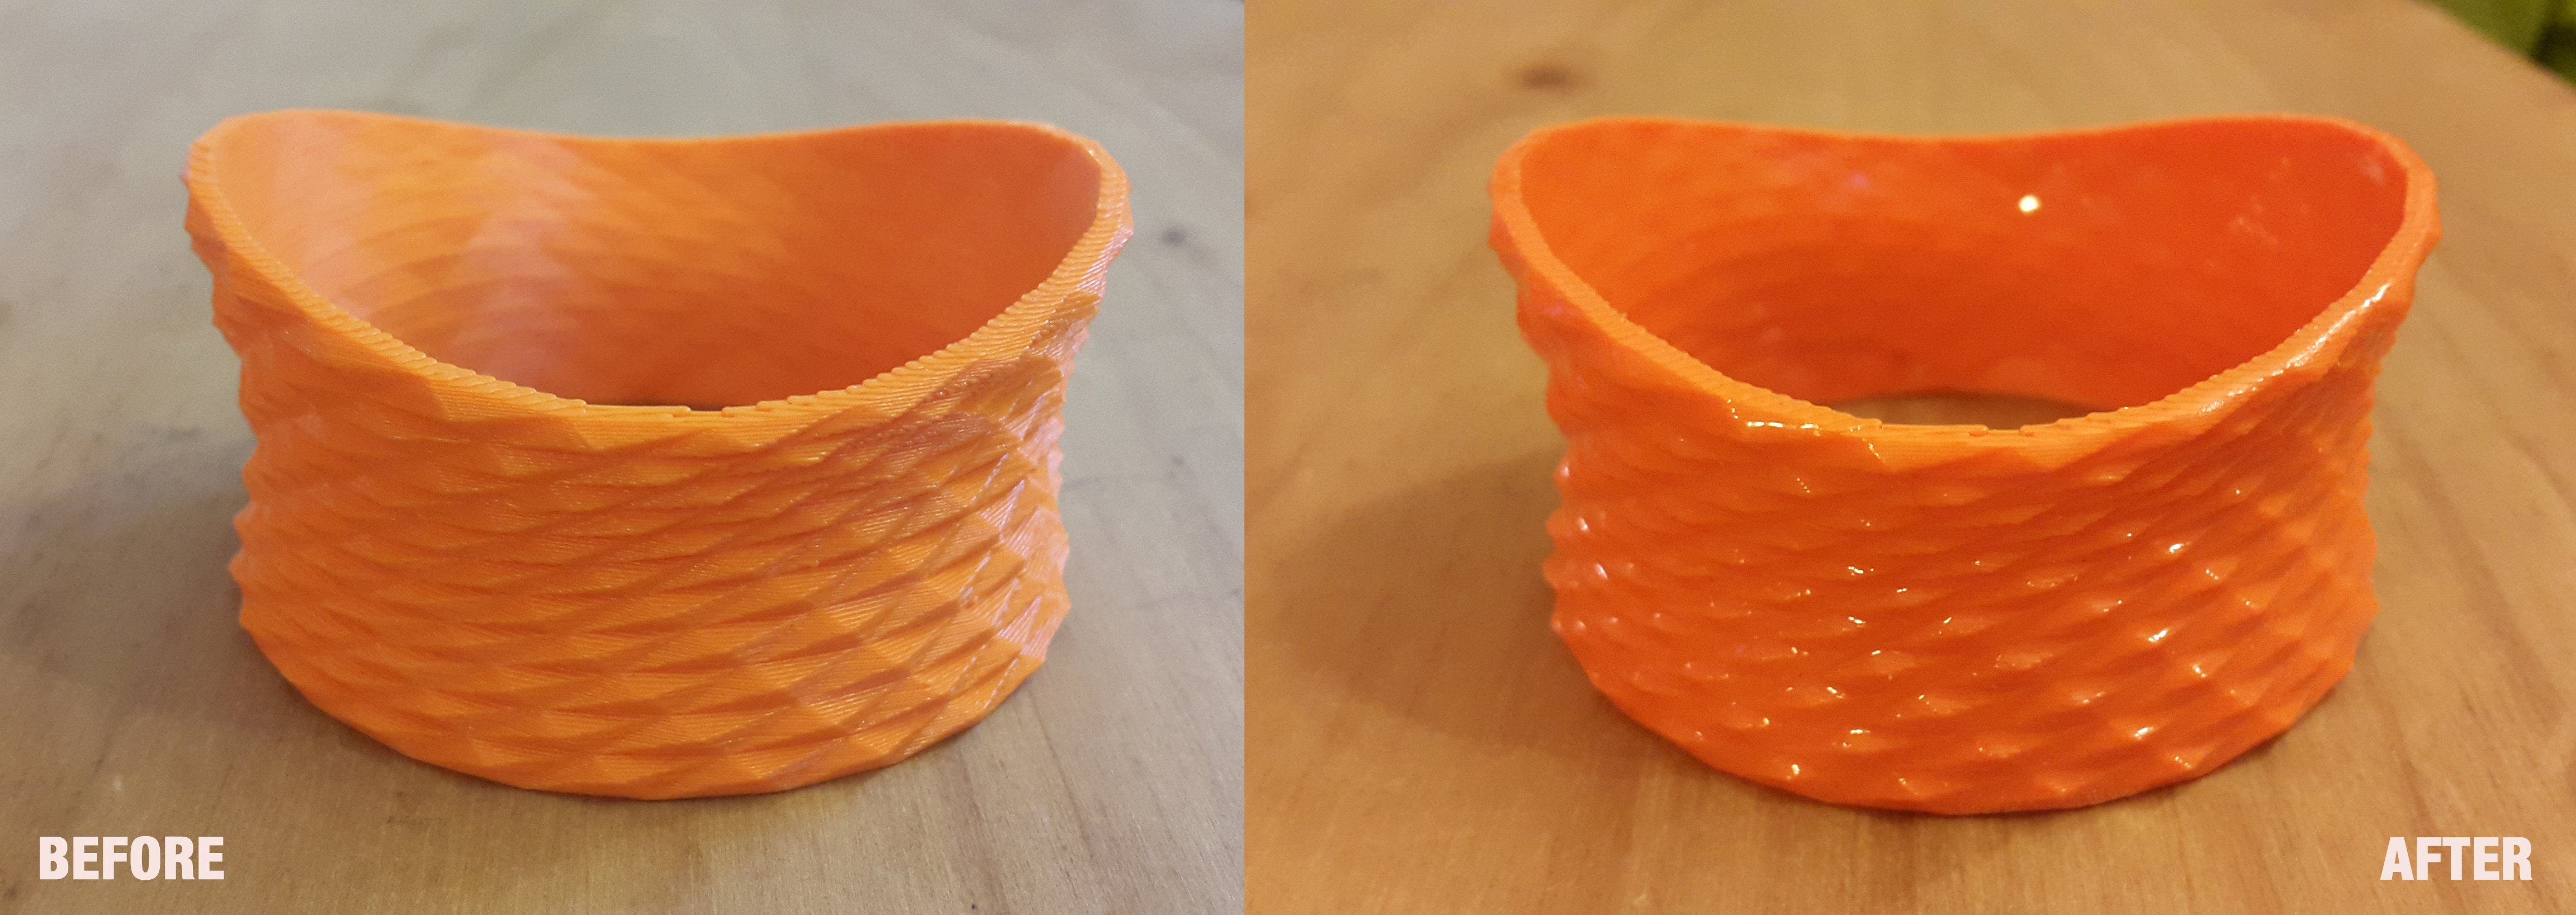
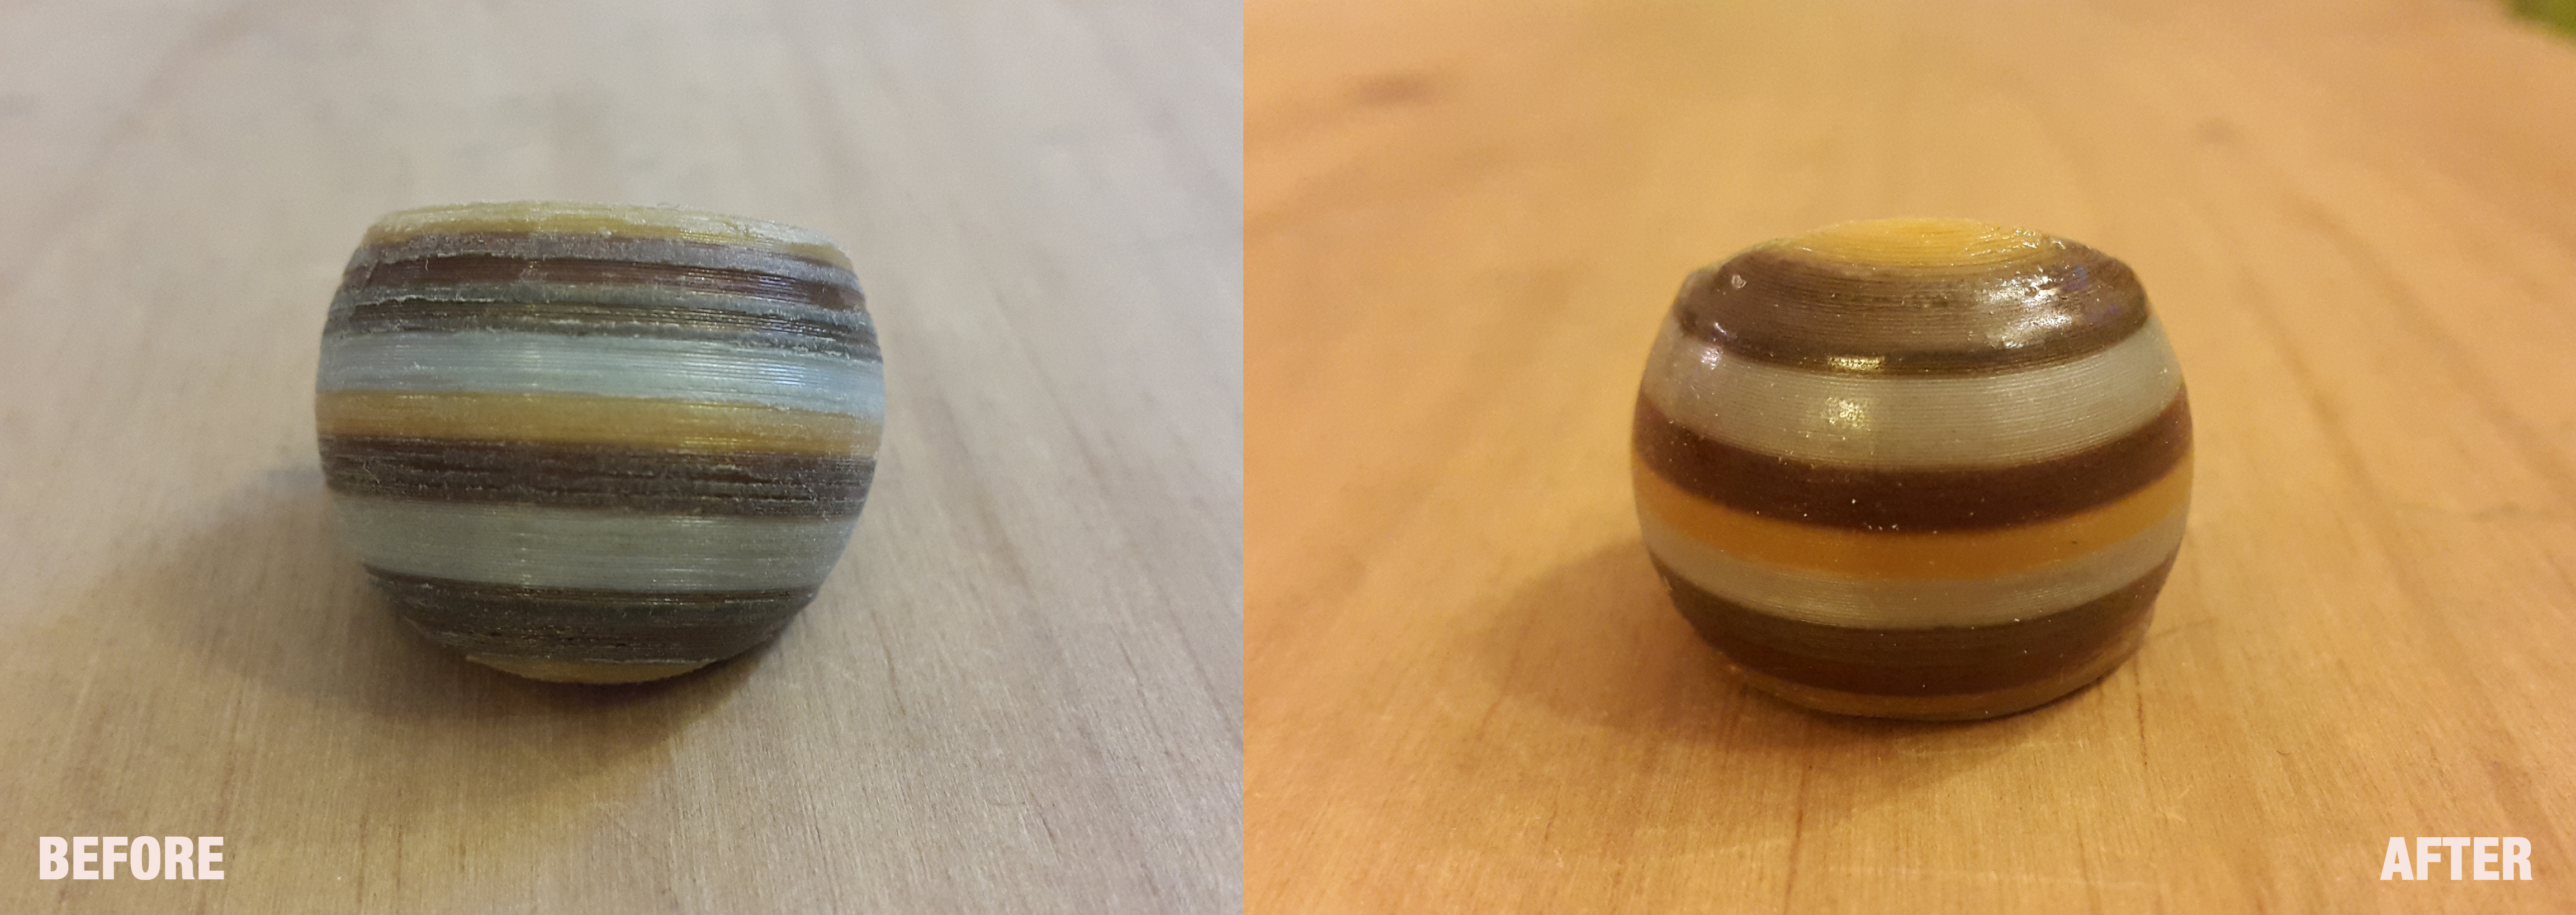
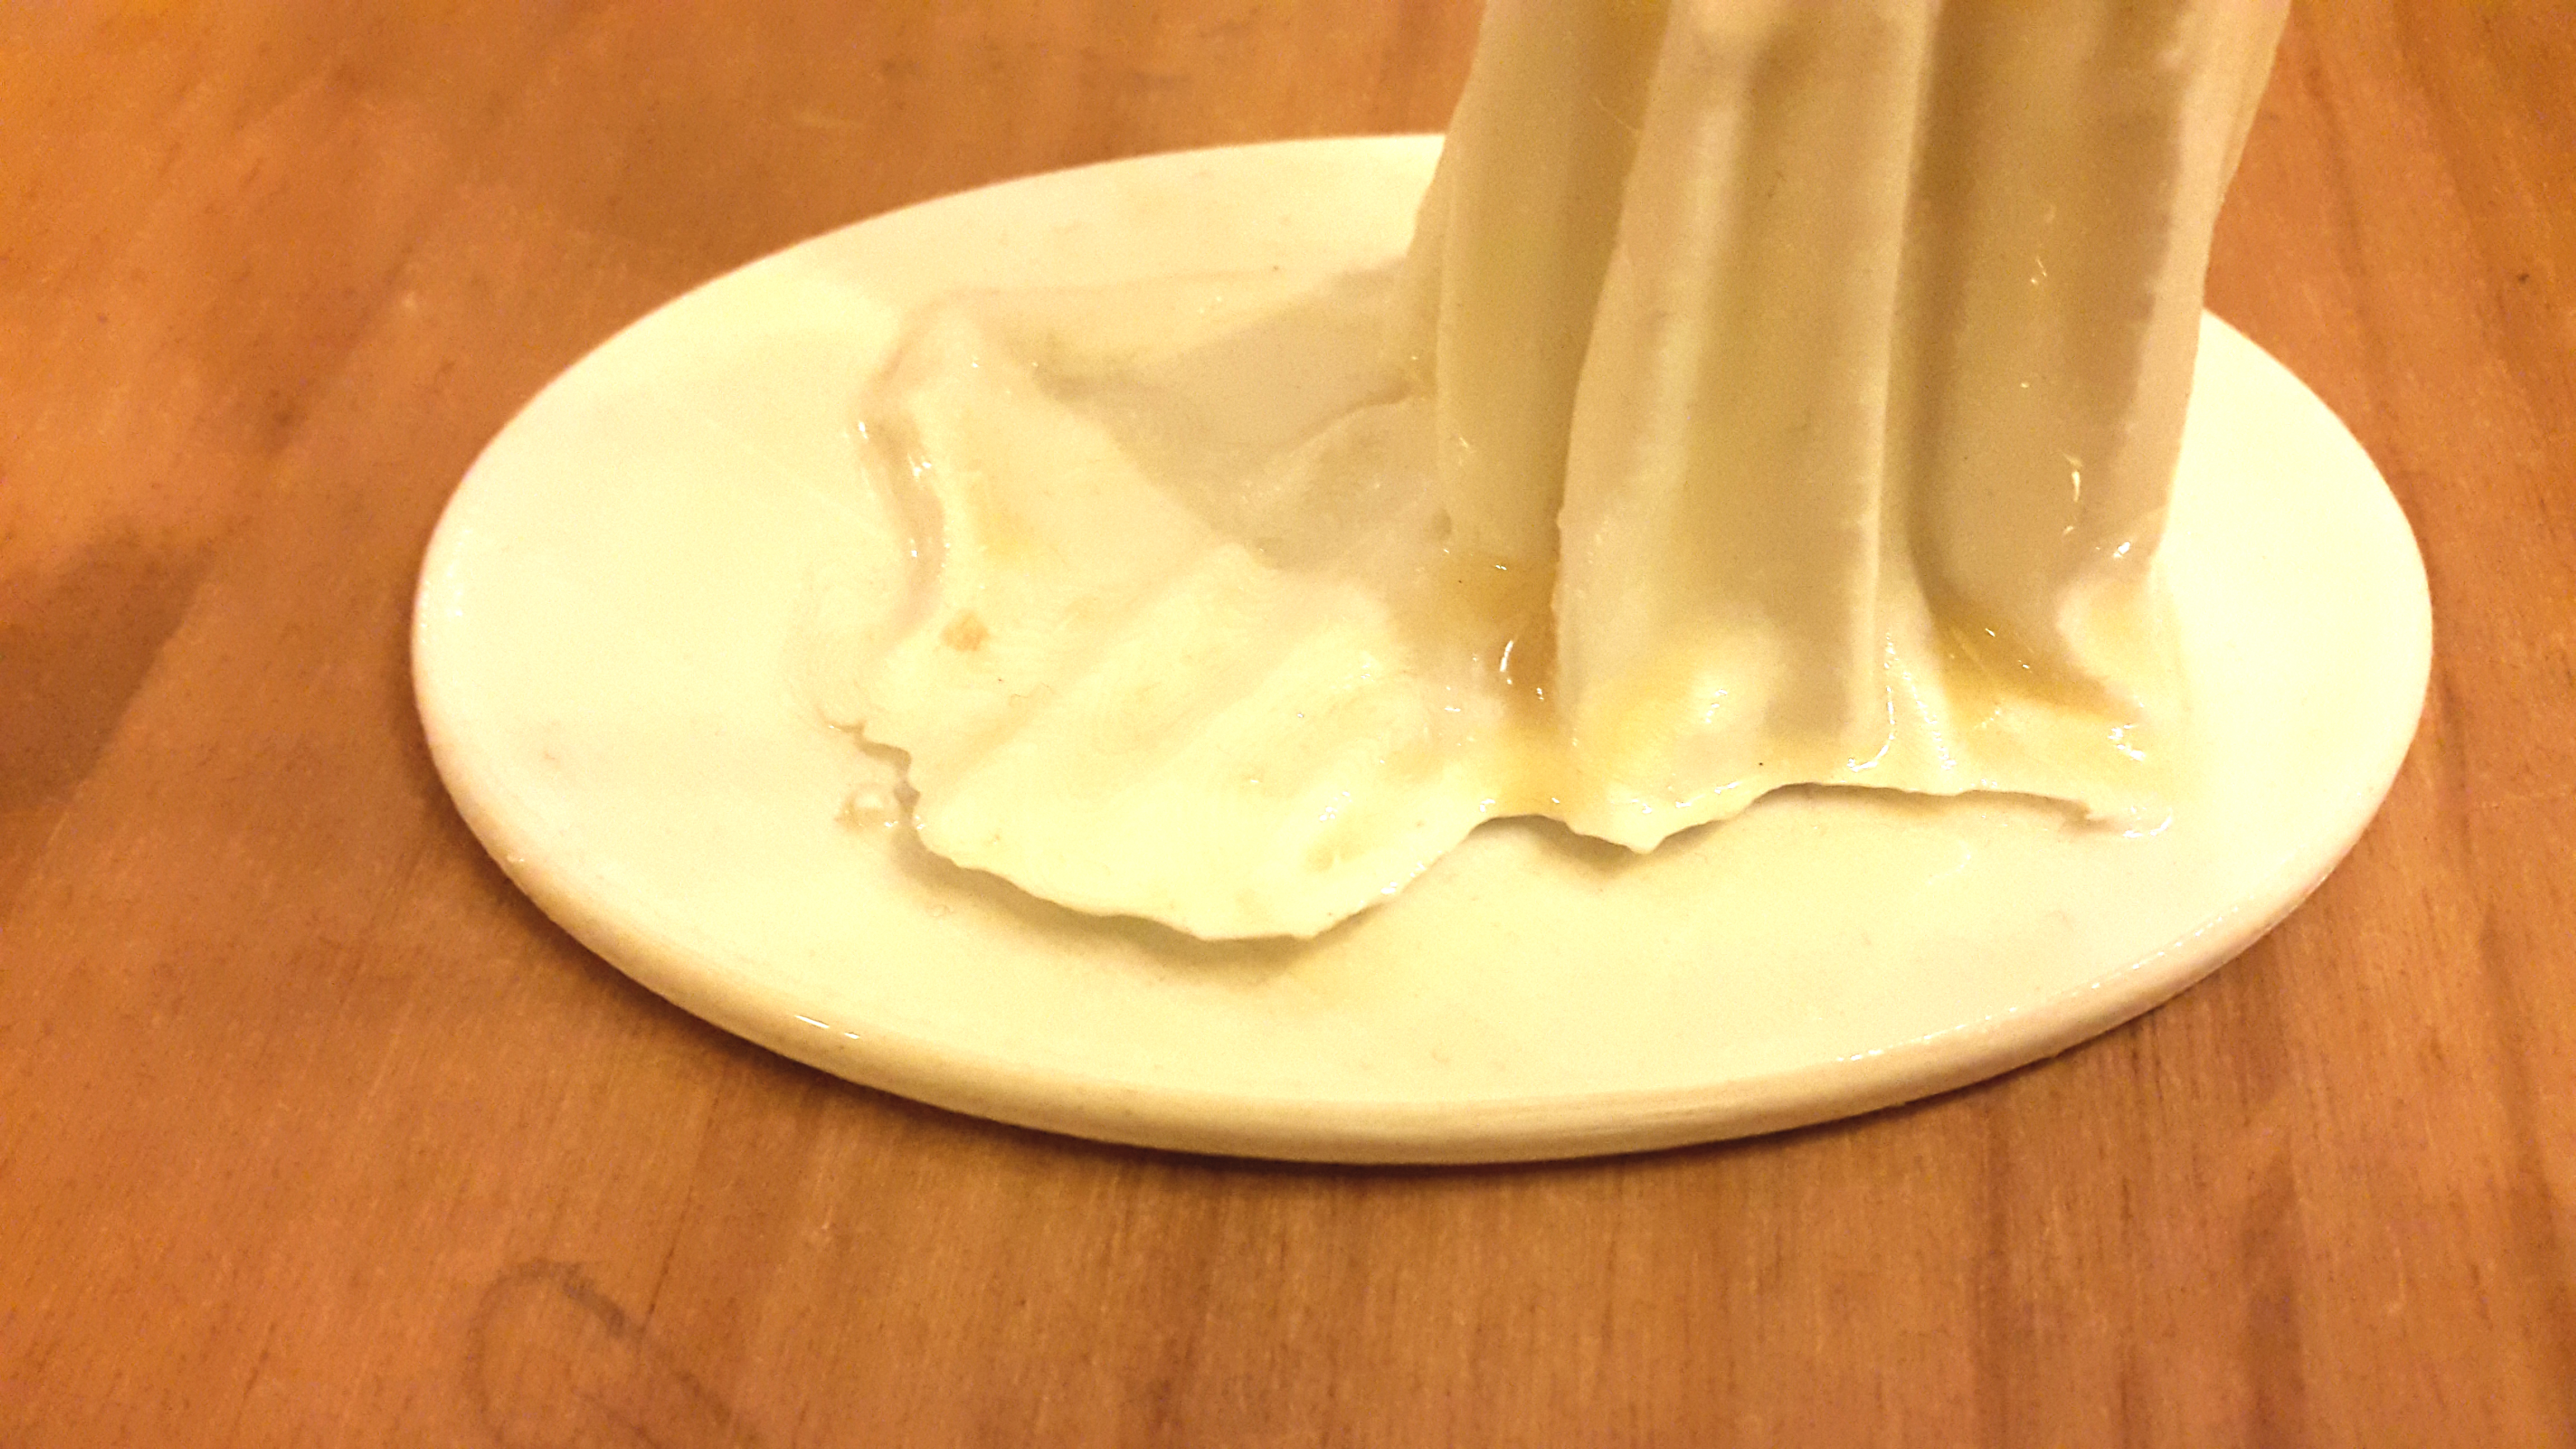
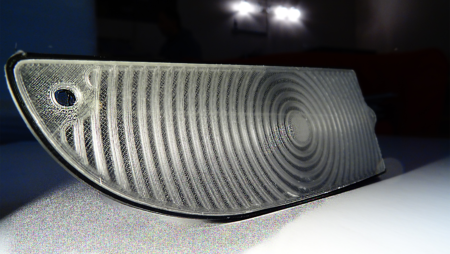
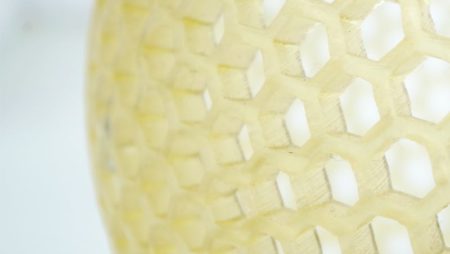
- Take your 3D printed object, the brush and start covering the object with the liquid. The coating self-levels and wets out uniformly without leaving brush strokes. Nevertheless, watch out to not use too much of the liquid since it can leave ugly yellow stains and/or tears (see picture above). Do not coat the object on the bottom to prevent it from sticking on the drying base afterwards.
- When your object is coated put it on the with aluminium covered platform and let it dry for 2-4 hours (depending on mass and temperature and can be reduced by using a hairdryer).
Optional: The coating can be sanded, primed, and painted after it is dried.
We recommend the use of XTC-3D whenever you want a nice glossy finish that maintains or even enhances the filament’s color intensity while it is removing texture from your 3D prints. Especially for PLA that is sometimes hard to sand Smooth On’s coating can be a good alternative. And since the XTC-3D cures to a hard, impact resistant coating it is suitable for strengthening fragile and/or broken parts of your print.
You have questions or need help with the use of XTC-3D? Write us, call us or simply stop by in our 3D printing Café in Berlin. We would be glad to help you out.
See you next week to a new episode of our Feature Friday and have a lovely weekend!
*pot life = How long can the liquid stay in the pot before it becomes solid.

No Comment
You can post first response comment.